
My Garage
My Account
Cart
Genuine Toyota Supra Idle Control Valve
IACV- Select Vehicle by Model
- Select Vehicle by VIN
Select Vehicle by Model
orMake
Model
Year
Select Vehicle by VIN
For the most accurate results, select vehicle by your VIN (Vehicle Identification Number).
5 Idle Control Valves found
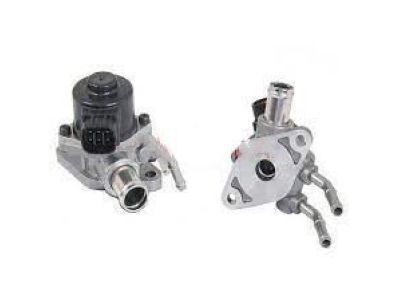
Toyota Supra Valve Assembly, Idle Speed Control
Part Number: 22270-46060$496.35 MSRP: $730.63You Save: $234.28 (33%)Ships in 1-3 Business DaysToyota Supra Valve Assembly, Idle Speed Control
Part Number: 22270-46050$497.87 MSRP: $732.86You Save: $234.99 (33%)Ships in 1-3 Business Days
Toyota Supra Idle Control Valve
If you are in demand for superior quality and affordable OEM Toyota Supra Idle Control Valve, then shop with us! We own a wide range of the reduced-priced genuine Toyota Supra Idle Control Valve. You can purchase in confidence as all parts come with a manufacturer's warranty. Any issues with our products? No need to worry as we have a hassle-free return policy to guide you every step of the way.
Toyota Supra Idle Control Valve Parts Questions & Experts Answers
- Q: How to perform an on-vehicle check, remove, bench test, and install the ISC valve on Toyota Supra?A: Start the engine and then turn it off, verifying that the Idle Control Valve makes a clicking sound immediately after the engine stops; if it doesn't, remove and bench test the valve. Disconnect the cable from the negative terminal of the battery, ensuring to check for any anti-theft system in the stereo before detaching the cable. Unplug the Idle Control Valve electrical connectors, then detach the coolant by-pass hoses and air hoses from the Idle Control Valve, plugging the coolant hoses if coolant begins to flow out. Remove the Idle Control Valve mounting bolts, the valve, and the gasket, and for turbo models, also remove the seal washer and check valve from the air intake chamber. Using an ohmmeter, measure the resistance between terminal B1 and S1 or S3, and between B2 and S2 or S4, comparing the measurements to the specific resistance values; if they are outside the specified range, replace the Idle Control Valve. Apply battery voltage to terminals B1 and B2 while grounding terminals S1, S2, S3, S4 in sequence to verify that the valve moves toward the closed position, and then repeat the process grounding in reverse order to check for movement toward the open position; if the valve does not perform as expected, replace it. For installation, reverse the removal steps, ensuring to install the check valve and seal washer in the air intake chamber first for turbo models, and use a new gasket on all models. Finally, check the coolant level and add as necessary to reach the desired level.
Related Toyota Supra Parts
Browse by Year
1998 Idle Control Valve 1997 Idle Control Valve 1996 Idle Control Valve 1995 Idle Control Valve 1994 Idle Control Valve 1993 Idle Control Valve 1992 Idle Control Valve 1991 Idle Control Valve 1990 Idle Control Valve 1989 Idle Control Valve 1988 Idle Control Valve 1987 Idle Control Valve 1986 Idle Control Valve


