×
- Live Chat
- 1-888-905-9199


My Garage
My Account
Cart
Genuine Toyota T100 Variable Timing Sprocket
Timing Gear Sprocket- Select Vehicle by Model
- Select Vehicle by VIN
Select Vehicle by Model
orMake
Model
Year
Select Vehicle by VIN
For the most accurate results, select vehicle by your VIN (Vehicle Identification Number).
3 Variable Timing Sprockets found
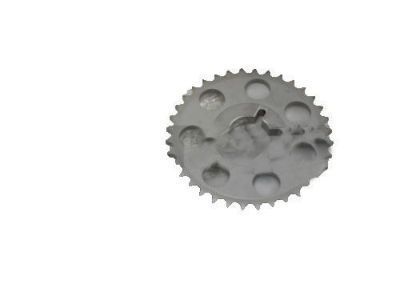
Toyota T100 Gear, CAMSHAFT TIMIN
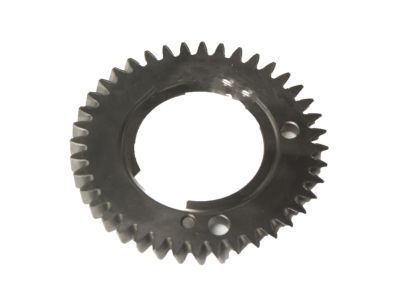
Part Number: 13523-75010$43.98 MSRP: $61.48You Save: $17.50 (29%)Ships in 1-3 Business DaysToyota T100 Gear, Camshaft Sub
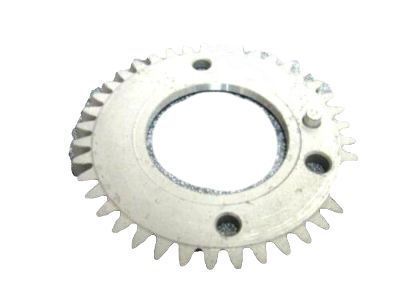
Part Number: 13529-62901$69.70 MSRP: $98.25You Save: $28.55 (30%)Ships in 1-3 Business DaysToyota T100 Gear, Camshaft Sub
Part Number: 13529-74900$69.70 MSRP: $98.25You Save: $28.55 (30%)Ships in 1-3 Business Days
Toyota T100 Variable Timing Sprocket
If you are in demand for superior quality and affordable OEM Toyota T100 Variable Timing Sprocket, then shop with us! We own a wide range of the reduced-priced genuine Toyota T100 Variable Timing Sprocket. You can purchase in confidence as all parts come with a manufacturer's warranty. Any issues with our products? No need to worry as we have a hassle-free return policy to guide you every step of the way.
Toyota T100 Variable Timing Sprocket Parts Questions & Experts Answers
- Q: How to remove and install a timing belt and Sprocket on Toyota T100?A: Disconnect the negative cable from the battery, ensuring you have the correct activation code for the stereo if it has an anti-theft system. Remove the engine protection cover from below the engine compartment, followed by the fan shroud and fan assembly. Drain the coolant and remove the radiator from the engine compartment. Take off the drivebelts from the alternator and power steering pump, and remove the spark plug wires. Raise the front of the vehicle securely on jackstands, apply the parking brake, and block the rear wheels. For 3.0L engines, remove the studs from the water outlet, while for 3.4L engines, remove the power steering pump without disconnecting the hoses and set it aside. Remove the A/C compressor and bracket, then the spark plugs. Take off the upper timing belt cover and gasket, and on 3.4L engines, also unbolt and remove the fan hub and bracket. Position the number one piston at TDC and check for installation marks on the timing belt; if they are obscured, make new ones. Ensure the camshaft pulley timing marks are aligned, then remove the timing belt tensioner, including the rubber boot. If reusing the timing belt, mark it at the exact location of each timing mark on each sprocket. Remove the timing belt from the camshaft sprockets, and if they are worn or damaged, remove the valve cover and hold the camshaft with a wrench while loosening the sprocket bolt. Remove the number 2 idler pulley and the crankshaft pulley bolt, using a large screwdriver to prevent the engine from turning while loosening the bolt. Once loosened, check the TDC position of the crankshaft again if disturbed. The crankshaft pulley should come off with hand pressure; if not, use two prybars to lever it off. Remove the lower timing belt cover and gasket, ensuring to take off the fan bracket assembly on 3.4L engines before the timing belt cover. Slip the timing belt guide off the crankshaft and remove the number 1 idler pulley. If reusing the belt, check for a mark adjacent to the drilled mark on the crankshaft sprocket and make a new one if necessary. If the crankshaft sprocket is worn or damaged, remove it carefully, using two screwdrivers or a steering wheel type puller if needed, taking care not to damage the crankshaft sensor portion. Inspect the timing belt for any signs of damage or wear, and check the belt tensioner for oil leakage and proper function. Measure the pushrod protrusion and compare it to specifications, replacing the tensioner if necessary. Ensure the idler pulleys turn smoothly. Before starting the engine, rotate the crankshaft by hand through at least two full revolutions, checking for any resistance. Clean the timing belt area, align the crankshaft timing sprocket keyway with the crankshaft key, and install the sprocket with the flange side up. Apply thread locking compound to the idler pulley bolt, position the idler pulley, and install the bolt, tightening it to the specified torque. Install the timing belt starting at the crankshaft sprocket, aligning marks if reusing the original belt, and install the belt over the lower idler and water pump pulleys. Slip the belt guide over the crankshaft, install the lower timing belt cover and gasket, and then the crankshaft sprocket, aligning the keyway and tightening the bolt. Install the upper idler pulley and ensure it turns smoothly. Install the front camshaft sprocket, aligning the pin hole with the pin in the camshaft, and tighten the retaining bolt. Recheck the timing marks to ensure the crankshaft hasn't turned, adjusting the timing belt position if necessary. Align the rear camshaft knock pin hole at the top, adjusting the camshaft if needed. Turn the front camshaft sprocket slightly and align the installation mark with the timing mark before slipping the belt onto the sprocket. Install the rear camshaft sprocket, ensuring the timing mark is aligned, and slip the belt onto the sprocket. Compress the timing belt tensioner pushrod and insert a pin to hold it in place, then install the tensioner and tighten the bolts. Turn the crankshaft slowly through two complete revolutions and recheck the timing marks, repeating the installation procedure if they are not aligned. Finally, install the upper timing belt cover and gasket, and reinstall the remaining parts in reverse order of removal.


