Make sure this part fits

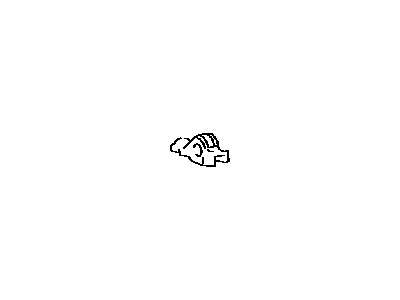
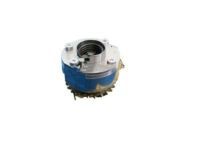
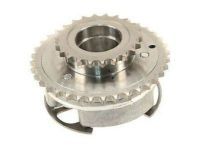
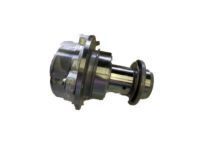
Toyota 13801-0P010 Arm Sub-Assembly, Valve Rocker

2005-2022 Toyota 138010P010

Customer Questions & Expert Answers (8)
Toyota 13801-0P010 Arm Sub-Assembly, Valve Rocker
  • Part Description
    Arm Sub-Assy, Valve Rocker, NO.1
  • Part Name Code
    13801
  • Replaces
    13801-23011, 13801-23010
  • Manufacturer
    Toyota
Make sure this part fits
$49.28 MSRP: $68.87
You Save: $19.59 (29%)
Ships in 1 Business Day
1
ADD TO CART
  • Related Parts
  • Product Specifications
  • Vehicle Fitment
  • Customer Questions & Expert Answers
  • Product Specifications

    BrandGenuine Toyota
    Part Name Code13801
    Manufacturer Part Number13801-0P010
    Part DescriptionArm Sub-Assy, Valve Rocker, NO.1
    Other NamesRocker Arms
    Item Dimensions3.8 x 2.5 x 1.4 inches
    Item Weight0.90 Pounds
    ConditionNew
    Fitment TypeDirect Replacement
    Replaces13801-23011, 13801-23010
    ManufacturerToyota
    SKU13801-0P010
    WarrantyThis genuine Toyota part is guaranteed by Toyota's factory warranty.
    Shipping & ReturnShipping Policy Return Policy
    Warning: California’s Proposition 65
  • Vehicle Fitment

    Year Make Model Trim & Engine Important vehicle option details
    2011-2016 Scion tC4 Cyl 2.5L2ARFE; 2ARFE; AGT20L-ALFGKA, AGT20L-ALFGKK, AGT20L-ALTGKA, AGT20L-ALTGKK
    2008-2014 Scion xD4 Cyl 1.8L2ZRFE; 2ZRFE; ZSP110L-AHMRKA, ZSP110L-AHMRKK, ZSP110L-AHPRKA, ZSP110L-AHPRKK
    2010-2022 Toyota 4Runner4 Cyl 2.7L, 6 Cyl 4.0L1GRFE, 2TRFE; 1GRFE, 2TRFE; GRN280L-GKAGKA, GRN285L-GKAGKA, TRN280L-GKPGKA, TRN285L-GKPGKA
    2005-2018 Toyota AvalonLimited, XL, XLE, XLE Premium, XLE Touring Or Touring, XLS|4 Cyl 2.5L, 6 Cyl 3.5L2ARFXE, 2GRFE; 2ARFXE, 2ARFXE; AVX40L-AEXGBA, 2GRFE; AVX40L-AEXGBA, 2GRFE; GSX30L-AEAGKA, AVX40L-AEXPBA, GSX30L-AEAGKA, GSX30L-AEANKA, GSX30L-AEAPKA, GSX30L-AETGKA, GSX30L-AETNKA, GSX30L-AETPKA, GSX40L-AETGKA, GSX40L-AETPKA, GSX40L-AETQKA
    2007-2017 Toyota CamryLE, N, SE, XLE, XSE|4 Cyl 2.5L, 6 Cyl 3.5L2ARFE, 2ARFXE, 2GRFE; 2ARFE, 2ARFXE, 2GRFE; ASV40L-AETGKA, 2GRFE; ASV40L-CEFNKA, ASV40L-AETNKA, ASV40L-CEFNKA, ASV40L-CEFSKA, ASV40L-CETGKA, ASV40L-CETNKA, ASV40L-CETSKA, ASV50L-CETEKA, ASV50L-CETGKA, ASV50L-CETNKA, ASV50L-CETPKA, ASV50L-CETSKA, AVV50L-CEXGBA, AVV50L-CEXNBA, AVV50L-CEXSBA, GSV40L-AETGKA, GSV40L-AETNKA, GSV40L-CETGKA, GSV40L-CETNKA, GSV40L-CETSKA, GSV50L-CETGKA, GSV50L-CETSKA
    2009-2018 Toyota CorollaCE, ECO, ECOSW, LE, S, STD|4 Cyl 1.8L2ZRFAE, 2ZRFE; 2ZRFAE, 2ZRFE; ZRE142L-AEPDKA, ZRE142L-AEPNKA, ZRE142L-DEMDKA, ZRE142L-DEMDKK, ZRE142L-DEMSKA, ZRE142L-DEMSKK, ZRE142L-DEPDKA, ZRE142L-DEPDKK, ZRE142L-DEPNKA, ZRE142L-DEPNKK, ZRE142L-DEPSKA, ZRE142L-DEPSKK, ZRE172L-DEFDKA, ZRE172L-DEFDKK, ZRE172L-DEFSKA, ZRE172L-DEFSKK, ZRE172L-DEPDKA, ZRE172L-DEPDKK, ZRE172L-DEXDKA, ZRE172L-DEXDKK, ZRE172L-DEXNKA, ZRE172L-DEXNKK, ZRE172L-DEXPPA, ZRE172L-DEXPPK, ZRE172L-DEXQPA, ZRE172L-DEXQPK, ZRE172L-DEXSKA, ZRE172L-DEXSKK
    2009-2014 Toyota FJ Cruiser6 Cyl 4.0L1GRFE; 1GRFE; GSJ10L-GKASKA, GSJ15L-GKASKA, GSJ15L-GKFSKA
    2008-2019 Toyota HighlanderGrande, Limited, Medium, STD, Sport|4 Cyl 2.7L, 6 Cyl 3.5L1ARFE, 2GRFE, 2GRFXE; 1ARFE, 2GRFE, 2GRFE; ASU40L-ARTNKA, 2GRFXE; ASU40L-ARTNKA, ASU40L-BRTNKA, ASU50L-ARTNKA, GSU40L-ARAGKA, GSU40L-ARAMKA, GSU40L-ARANKA, GSU40L-ARASKA, GSU40L-BRAGKA, GSU40L-BRAMKA, GSU40L-BRANKA, GSU40L-BRASKA, GSU45L-ARAGKA, GSU45L-ARAMKA, GSU45L-ARANKA, GSU45L-ARASKA, GSU45L-BRAGKA, GSU45L-BRAMKA, GSU45L-BRANKA, GSU45L-BRASKA, GSU50L-ARTGKA, GSU50L-ARTMKA, GSU50L-ARTNKA, GSU55L-ARTGKA, GSU55L-ARTMKA, GSU55L-ARTNKA, GVU48L-BRXGKA, GVU48L-BRXNKA, GVU58L-ARXGKA, GVU58L-ARXMKA, GVU58L-ARXNKA
    2008-2017 Toyota Land Cruiser8 Cyl 5.7L3URFE; 3URFE; URJ200L-GNTEKA, URJ200L-GNZVKA
    2009-2014 Toyota Matrix4 Cyl 1.8L2ZRFE; 2ZRFE; ZRE142L-DHMDKA, ZRE142L-DHMDKK, ZRE142L-DHPDKA, ZRE142L-DHPDKK
    View More
  • Customer Questions & Expert Answers

    Q:
    Does it fit my car? Posted by ToyotaPartsDeal Specialist
    A:
    You can Select Your Vehicle to check if 13801-0P010 fits your vehicle.
    Posted by ToyotaPartsDeal Specialist
    Q:
    How to remove the Camshaft and Rocker Arm on V6 engine on Toyota Camry? Posted by Customer
    A:
    This procedure requires engine and transaxle removal. Drain engine oil and coolant, then remove timing chains and sprockets. Ensure correct camshaft positioning before removal. Gradually remove bearing cap bolts, then housing bolts. Remove bearing caps and camshafts, and pry off camshaft housing. Remove and inspect rocker arms and lash adjusters. Check cam lobes and bearing journals for damage. Measure camshaft lobe and journal dimensions, replacing any outside specified limits. Check oil clearance for each camshaft journal, replacing if necessary. Lubricate and reinstall lash adjuster bores, rocker arms, camshafts, bearing caps, and housing. Apply RTV silicone sealer to sealing surfaces and tighten bolts. Repeat for front cylinder bank. Reinstall timing chains, cover, and components. Check for resistance by hand-rotating crankshaft. Refill oil and coolant, reconnect battery, start engine, and check for leaks.
    Posted by ToyotaPartsDeal Specialist
    Q:
    How to remove and install Camshaft and Rocker Arm in 3.5L V6 engine on Toyota Highlander? Posted by Customer
    A:
    For the removal procedure it is suggested that the engine and transaxle assembly must be removed. This is not a task for the novices so it is recommended to read the entire procedure before attempting it. The process of this work includes, for example, the removal of the engine oil and the engine coolant in the first step and subsequent removal of the timing chains or-more precisely-the timing sprockets. To access Intake cam lobe for No.1 cylinder: align the pointer to the 12 O'clock position- for the exhaust cam lobe align pointer to 3 O'clock Before removing the bearing cap bolts and housing bolts, these must be loosened in a sequence that is quite the reverse of the tightening order. Bolt and nut the camshafts and keep all the parts collectively. For 2GR-FKS engines, make sure the marks are in TDC position and then remove the camshaft timing gear bolts to remove the sprockets. Before releasing the bearing caps clear the intake camshaft locating pins, and to release the bolts do so in sequence starting with the last. Insert a spanner under the camshaft housing and pull it off the cylinder head while unbending the rocker arms and the lash adjusters and make sure they are placed in order. Check every rocker and lash adjuster for signs of wear, look closely at the cams for any possible damage to the cam lobes and the bearing journals, and determine the height of each of the camshaft's lobe and the diameter of the every journal. Use Plastigage to check the oil clearance of every camshaft journal and; if the measurement is not within the required limits, then the camshaft has to be replaced. For installation, lubricate the lash adjuster bores and the adjusters and position them with the original position of the rocker arms. The camshaft journals and lobes should be lubricated and the camshafts should be installed, the mating surfaces of the camshaft housing assembly should be coated with RTV silicone sealer before the camshaft housing is installed. After that, turn all bolts marked on the assembly with tightness to one another in the prescribed order to the required torque. The remaining steps of the installation process go in the reverse order of the removal, and one has to make sure to rotate the crankshaft to feel for any resistance after; the engine is refueled with oil and coolant; the battery is reconnected and the engine is started to see if there are any signs of leakage.
    Posted by ToyotaPartsDeal Specialist
    Q:
    How to remove and install Camshaft and Rocker Arm in 4.6L and 5.7L engine on Toyota Sequoia? Posted by Customer
    A:
    This removal procedure is very complex and is not meant for the rookies, so one must read it a number of times before going forward. First remove the connection of the cable from the negative terminal of the battery, then remove the oil and coolant of the engine. position the engine to number one cylinder top dead centre coupled and remove the timing chain and sprocket. To release the camshafts from the right cylinder head, one has to turn these till the protrusions of the knock kiss the surface of the head, then to loosen and unfasten the bearing cap bolts and housing bolts with the steps, which were applied at their tightening. Depress the bearing caps and the camshafts and in doing so, all the components used should be arranged and labeled. Clean and carefully unbolt the camshaft housing from the cylinder head, they should be easily separated with pliers but be watchful not to scratch the head; disassemble all the rocker arms and the lash adjusters, noting which belongs to which side. If you had to remove camshafts from the other cylinder head, the same has to be done here with the knock pins positioned in the right manner. Check each rocker and lash adjuster, checking the cam lobes and bearing journals for wear, and measuring the lift height of each cam lobe, and journal diameter with the micrometer if they are worn. Assess available oil using Plastigage, as well as, perform the proper procedure of installation of Plastigage. Removably fasten and lightly lubricate the lash adjuster bores and adjusters and also the rocker arms. For the right side, it is necessary to liberally apply the camshaft journals and the camshafts put in place with the knock pins in the correct manner After that, it is necessary to oil the upper bearing caps and then put them in place. Wipe each of the sealing surfaces and apply RTV silicone sealer as shown, on the camshaft housing assembly before installing and torquing the mounting bolts. Lubricate the other end in the same manner after unbolting the left side and then install the reverse of the removal in a step by step manner while turning the crankshaft to test if there is any resistance. Last, add the required amount of oil and coolant, reconnect the battery, turn the engine ON, and look for leaks, and it is normal to hear lifter noise for the next couple of minutes.
    Posted by ToyotaPartsDeal Specialist
    Q:
    How to remove, inspect, and install the camshaft and Rocker Arm on Toyota Rav4? Posted by Customer
    A:
    First of all you have to loosen the cable being connected with the negative terminal of the battery and then take out the engine along with the valve cover and of course make sure that the engine is at TDC what pertains to the number one cylinder and this can be checked by lining up the timing mark which is located at the crankshaft pulley and the "O"mark on the cover for timing chain. Ensure that the marks' front and rear on the camshaft sprocket align with the top of the timing chain cover, and paint the chain links of the upper timing marks. With the help of a wrench, lock the camshaft sprockets so that they do not rotate while removing the bolts of sprockets, then take away the timing chain cover and the tensioner. Rearm the timing chain away from the sprockets and take out the camshaft sprockets; notice the integration of the Variable Valve Timing (VVT) actuator. For the purpose of excluding foreign objects from the engine, put a rag into the opening of the timing chain cover. Tighten the camshaft housing bearing cap bolts uniformly in the sequence mentioned and then, remove the camshaft housing lightly and further, loosen the camshaft bearing cap bolts uniformly in the sequence stated above. If required, release or unbolt the bearing caps and inserts from the No.1 bearing cap together with the oil control filter, and the camshafts. Take off the rocker arms and lash adjusters from the cylinder head, and check the wear of various parts such as; camshaft sprockets and chains. Before the camshafts are pulled out, a camshaft end play check has to be done with the aid of a dial indi-cator, depending on the manufacturer, the cam-shaft bearing surfaces also have to be checked for any signs of wear. It is necessary to check each camshaft bearing journal outside diameter and each camshaft bearing inside diameter to define oil clearance and is within the prescriptions. You should record the height of every camshaft lobe and also check the run out on every lobe with the dial indicator. This can be done on the rocker arms and lash adjusters with a view of establishing whether they are worn out or not. For reassemble, apply the engine oil in the lash adjusters and then he installed them together with the rocker arms. Place the camshaft bearings to the camshaft housing, apply oil to the camshaft asperities and journals and then place the camshaft. Place the oil control valve filter into the No.1 bearing cap, then put in and fasten the camshaft bearing caps. Ensure that the rocker arms are correctly located and align the dowel pins to the necessary angles, the camshaft housing mounting surface should be clean before applying seal packing. Place the camshaft housing on the cylinder head and fasten the mounting screws and next put the sprockets, timing chain, and the timing chain cover back in reverse order.
    Posted by ToyotaPartsDeal Specialist
    Q:
    How to remove and install Camshaft and Rocker Arm in 3.5L V6 engine on Toyota Sienna? Posted by Customer
    A:
    This procedure is a bit complicated and therefore, any person who feels that he or she is capable of performing the activity at home should first go through the following procedure very carefully. However, to service this component the manufacturer advises that the engine and transaxle assembly is removed. This is simply done by first disconnecting one end of the cable that is grounded on the negative terminal of the battery followed by the draining of both the engine oil and the coolant. SLine off the timing chains and sprockets. In order to remove camshafts from the right cylinder head, turn them counter clockwise until intake cam lobe for No. 1 cylinder is at 12 o'clock position and exhaust cam lobe is at 3 o'clock position. To a point, the maintenance engineer should unstretch and unscrew the other small caps of the bearing and the other housing bolts in a thread pattern that is the reverse of the earlier tightened ones. Belay all bearing caps as well as the camshafts, while organizing the parts, perhaps with the help of labels. Disconnect the camshaft housing from the cylinder head with the necessary force, and then unbolt all the rocker arms and the lash adjusters, but before that, number them so that they can be easily replaced. If camshafts were removed from the other cylinder head, do the same for this head with the front camshaft lobes facing forward. Check each rocker and lash adjuster for signs of wear, look for any signs of damage on the cam lobes and bearing journals and take the height of each camshaft lobe and the diameter of each journal to the nearest thousandth with the help of a micrometer if it is not to standard. Oil clearance for each camshaft journal should be checked using Plastigage where the components should be cleaned and procedure of installing Plastigage followed. Coat the interior of the lash adjuster bores and the lash adjusters lightly with oil before reinstalling the lash adjusters, and then reinstall the rocker arms in their former positions. For the right side, the procedures include camshaft journals lubrication, camshafts installation with the proper orientation, as for the upper bearing caps they also require oil application before they are tightened. Clean sealing surfaces and apply RTV silicone sealer before finally installing camshaft housing assembly, and fastening the mounting bolts. Perform the same process in lubrication and installation to the left side of the car, except for the bolts, which are different in number. As it is, reverse all the things done during removal process, add oil and coolant to the engine, reconnect the battery, start the engine, and examine whether there is any leakage and allow time for loud lifter knock to cease.
    Posted by ToyotaPartsDeal Specialist
    Q:
    How to remove and install Camshaft and Rocker Arm in 4.6L and 5.7L engine on Toyota Tundra? Posted by Customer
    A:
    This removal procedure is very complex and is not meant for the rookies, so one must read it a number of times before going forward. First remove the connection of the cable from the negative terminal of the battery, then remove the oil and coolant of the engine. position the engine to number one cylinder top dead centre coupled and remove the timing chain and sprocket. To release the camshafts from the right cylinder head, one has to turn these till the protrusions of the knock kiss the surface of the head, then to loosen and unfasten the bearing cap bolts and housing bolts with the steps, which were applied at their tightening. Depress the bearing caps and the camshafts and in doing so, all the components used should be arranged and labeled. Clean and carefully unbolt the camshaft housing from the cylinder head, they should be easily separated with pliers but be watchful not to scratch the head; disassemble all the rocker arms and the lash adjusters, noting which belongs to which side. If you had to remove camshafts from the other cylinder head, the same has to be done here with the knock pins positioned in the right manner. Check each rocker and lash adjuster, checking the cam lobes and bearing journals for wear, and measuring the lift height of each cam lobe, and journal diameter with the micrometer if they are worn. Assess available oil using Plastigage, as well as, perform the proper procedure of installation of Plastigage. Removably fasten and lightly lubricate the lash adjuster bores and adjusters and also the rocker arms. For the right side, it is necessary to liberally apply the camshaft journals and the camshafts put in place with the knock pins in the correct manner After that, it is necessary to oil the upper bearing caps and then put them in place. Wipe each of the sealing surfaces and apply RTV silicone sealer as shown, on the camshaft housing assembly before installing and torquing the mounting bolts. Lubricate the other end in the same manner after unbolting the left side and then install the reverse of the removal in a step by step manner while turning the crankshaft to test if there is any resistance. Last, add the required amount of oil and coolant, reconnect the battery, turn the engine ON, and look for leaks, and it is normal to hear lifter noise for the next couple of minutes.
    Posted by ToyotaPartsDeal Specialist
    Q:
    What should be done with the rocker arms and lash adjusters during this procedure for the 2012 Toyota Avalon? Posted by Customer
    A:
    Remove all rocker arms and lash adjusters and place them in a labeled box. Inspect each rocker and lash adjuster arm for wear.
    Posted by ToyotaPartsDeal Specialist
    See expert answers on similar Rocker Arm
    If you have any questions about this product, please don't hesitate to ask us. We will be happy to help you!

Genuine Toyota Part 13801-0P010, the Right Choice

To ensure reliability, purchase Toyota part # 13801-0P010 Arm Sub-Assembly, Valve Rocker. It is sometimes referred to as Toyota Rocker Arm. For unrivaled quality, OEM parts are the ultimate choice. These parts are manufactured by Toyota's official factory using top-quality materials and undergo strict testing procedures, ensuring outstanding dependability and long-lasting durability. This part fits 2010-2022 Toyota 4Runner, 2007-2017 Toyota Camry, 2008-2019 Toyota Highlander, 2005-2015 Toyota Tacoma.

ToyotaPartsDeal.com is a leading supplier of genuine Toyota parts and accessories such as Toyota 138010P010 Arm Sub-Assembly, Valve Rocker. In need of OEM Toyota parts? Look no further than our extensive inventory of genuine Toyota parts, competitively priced to be highly exceptional in the market. They are all manufacturer-warrantied. Add to that, our easy return policy and swift delivery service, and your shopping experience promises to be the great pleasant ever. For detailed Toyota parts information, click here.

Why choose Toyota Parts Deal

  • Dedicated Service

    Your complete satisfaction is our #1 goal

  • Lowest Prices

    Best deals on genuine OE parts from dealerships

  • Fast Delivery

    Orders are processed and delivered promptly