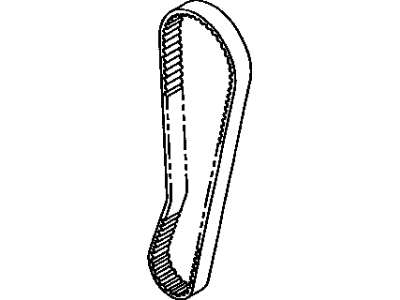
To remove the components, start by disconnecting the cable from the negative terminal of the battery, then disconnect the spark plug boots from the spark plugs and set them aside before removing the spark plugs. Next, disconnect the power brake booster hose from the metal vacuum transmitting pipe located in the front right corner of the engine compartment. Locate the wire harness routed between the right end of the cylinder head covers and the upper timing belt cover, label both ends of each connector, disconnect them, and free the harness assembly from the two upper timing belt cover studs. Remove the two upper and three lower bolts from the upper timing belt cover, then loosen the water pump pulley bolts without removing them, followed by loosening the alternator adjustment bolt and the AIC compressor drivebelt idler pulley bolt to take the tension off the drivebelt. Remove the AIC compressor drivebelt, loosen the lug nuts on the right rear wheel, raise the vehicle securely on jackstands, and remove the wheel. Loosen the alternator pivot bolt, rotate the alternator toward the block, and remove the alternator drivebelt. Remove the water pump pulley bolts and the pulley, ensuring it is taken off from above due to tight clearance. Set the piston in the No. 1 cylinder at TDC, remove the flywheel inspection cover bolts and the cover, then immobilize the crankshaft by jamming a large screwdriver between the flywheel ring gear teeth and the flywheel housing to break the crankshaft pulley bolt loose. Recheck the timing marks to ensure the piston in the No. 1 cylinder is still at TDC, then install a puller on the crankshaft pulley and remove it. Remove the four lower timing belt cover bolts and the cover, followed by the single remaining middle timing belt cover bolt and the cover. If reusing the timing belt, mark its direction of rotation and index it to the crankshaft and camshaft pulleys. Loosen the timing belt idler pulley bolt, push the pulley to the left, and temporarily retighten it. Support the engine with a floor jack, place a block of wood between the jack pad and the engine oil pan sump, raise the engine slightly, and disconnect the right mounting insulator from the engine block. Remove the timing belt, and if simply replacing it, skip the steps related to camshaft or crankshaft timing belt pulley removal and installation, proceeding to timing belt installation. Remove the speedometer cable bracket and the cylinder head covers, immobilize the camshaft by placing a wrench on the large hexagonal "nut" cast into the camshaft, break the camshaft timing pulley bolt loose, remove the bolt and pulley, ensuring not to rotate the camshaft during this process. Installation of the camshaft pulleys is the reverse of removal, ensuring the knock pins are positioned properly. Slide the camshaft timing belt pulleys onto the camshafts, aligning the index marks with the stamped match marks on the timing belt cover, and tighten the pulley bolts to the specified torque. Pry the crankshaft timing pulley loose from the crankshaft nose with a small pry bar or use a puller if necessary, ensuring not to turn the crankshaft during this process. Installation of the crankshaft pulley is the reverse of removal, aligning the TDC marks on the oil pump body and the crankshaft timing pulley. Slide the belt onto the camshaft timing belt pulleys and crankshaft pulley, push the tensioner to the left, and slide the timing belt into place against the tensioner pulley, ensuring none of the pulleys move out of alignment. Tighten the tensioner pulley bolt temporarily, rotate the engine two times, and check that the index marks on the three pulleys remain aligned with the stationary TDC marks. If aligned, tighten the tensioner pulley bolt to the specified torque, then install the timing belt guide, lower timing belt cover, middle timing belt cover, and upper timing belt cover, tightening all bolts securely. The remainder of the installation follows the reverse order of removal.
Posted by ToyotaPartsDeal Specialist 


