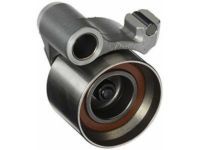
Make sure this part fits

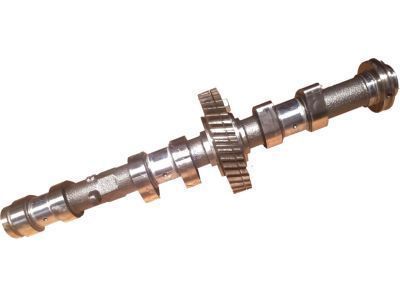
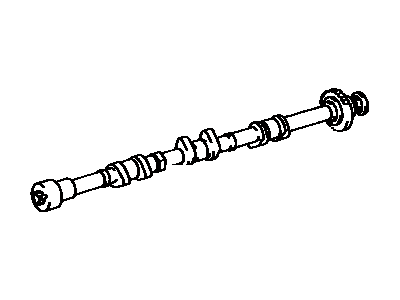
Toyota 13054-62030 CAMSHAFT Sub-Assembly

1992-2005 Toyota 1305462030

Customer Questions & Expert Answers (7)
Toyota 13054-62030 CAMSHAFT Sub-Assembly
  • Part Description
    Camshaft Sub-Assy, NO.4
  • Part Name Code
    13054
  • Manufacturer
    Toyota
Make sure this part fits
$214.36 MSRP: $307.37
You Save: $93.01 (31%)
Ships in 1-3 Business Days
1
ADD TO CART
  • Related Parts
  • Product Specifications
  • Vehicle Fitment
  • Customer Questions & Expert Answers
  • Product Specifications

    BrandGenuine Toyota
    Part Name Code13054
    Manufacturer Part Number13054-62030
    Part DescriptionCamshaft Sub-Assy, NO.4
    Other NamesCamshaft
    Item Dimensions14.6 x 7.4 x 5.1 inches
    Item Weight20.80 Pounds
    ConditionNew
    Fitment TypeDirect Replacement
    ManufacturerToyota
    SKU13054-62030
    WarrantyThis genuine Toyota part is guaranteed by Toyota's factory warranty.
    Shipping & ReturnShipping Policy Return Policy
    Warning: California’s Proposition 65
  • Vehicle Fitment

    Year Make Model Trim & Engine Important vehicle option details
    1996-2002 Toyota 4RunnerLULI, SR5B, SR5V|6 Cyl 3.4L5VZFE; 5VZFE; VZN180L-GKPGKA, VZN180L-GKPSKA, VZN180L-GKPZKA, VZN185L-GKMGKA, VZN185L-GKPGKA, VZN185L-GKPSKA, VZN185L-GKPZKA
    1992-1994 Toyota CamryDX, LE, SE, XLE|6 Cyl 3.0L3VZFE; 3VZFE; VCV10L-AEMNKK, VCV10L-AEMSKA, VCV10L-AEPDKA, VCV10L-AEPDKK, VCV10L-AEPGKA, VCV10L-AEPNKA, VCV10L-AEPNKK, VCV10L-AEPSKA, VCV10L-CEMSKA, VCV10L-CEPDKA, VCV10L-CEPGKA, VCV10L-CEPNKA, VCV10L-CEPSKA, VCV10L-CWPNKA, VCV10L-CWPNKK
    1994-1998 Toyota T100DLX, SR5, STD|6 Cyl 3.4L5VZFE; 5VZFE; VCK11L-CRMDKA, VCK11L-CRMDKK, VCK11L-CRMSKA, VCK11L-CRSDKA, VCK11L-CRSDKK, VCK11L-CRSSKA, VCK11L-THMDKA, VCK11L-THSDKA, VCK11L-TRMDKA, VCK11L-TRMDKK, VCK11L-TRMRKA, VCK11L-TRMSKA, VCK11L-TRSDKA, VCK11L-TRSDKK, VCK11L-TRSSKA, VCK21L-CRMDKA, VCK21L-CRMDKK, VCK21L-CRMSKA, VCK21L-CRMSKK, VCK21L-CRSDKA, VCK21L-CRSDKK, VCK21L-CRSSKA, VCK21L-CRSSKK, VCK21L-TRMDKA, VCK21L-TRMDKK, VCK21L-TRMSKA, VCK21L-TRMSKK, VCK21L-TRSDKA, VCK21L-TRSDKK, VCK21L-TRSSKA, VCK21L-TRSSKK
    1995-2004 Toyota TacomaDLX, SR5|6 Cyl 3.4L5VZFE; 5VZFE; VZN150L-CRMDKAB, VZN150L-CRSDKAB, VZN160L-TRMDKAB, VZN170L-CRMDKAB, VZN170L-CRMGKAB, VZN170L-CRPDKAB, VZN170L-CRPGKAB, VZN170L-PRPDKAB, VZN195L-CRPDKAB, VZN195L-PRPDKAB
    2000-2005 Toyota TundraDLX, Limited, SR5|6 Cyl 3.4L5VZFE; 5VZFE; VCK30L-ARMSKA, VCK30L-ARSLKA, VCK30L-ARSSKA, VCK30L-ARSSKK, VCK30L-TRMDKA, VCK30L-TRMDKK, VCK30L-TRSDKA, VCK30L-TRSDKK, VCK40L-ARMSKA, VCK40L-ARMSKK, VCK40L-ARSLKA, VCK40L-ARSSKA, VCK40L-ARSSKK, VCK40L-TRMDKK, VCK40L-TRMSKA, VCK40L-TRSDKK, VCK40L-TRSSKA
  • Customer Questions & Expert Answers

    Q:
    Does it fit my car? Posted by ToyotaPartsDeal Specialist
    A:
    You can Select Your Vehicle to check if 13054-62030 fits your vehicle.
    Posted by ToyotaPartsDeal Specialist
    Q:
    What are the steps involved in the removal and installation of the camshaft in Four cylinder engine on 1996 through 2002 Toyota 4Runner? Posted by Customer
    A:
    When carrying out this procedure, use two service bolts, which are usually 6 x 1.0 mm bolts but 16 to 20 mm long . First, begin disconnecting the valve cover and setting the engine at TDC position for the number one cylinder, then aligning the marks found on the camshaft drive and the driven gears to the cylinder head or the valve cover mating surface. Check the camshaft thrust clearance by using the dial indicator measure; if the reading is above the service limit remove the camshaft or cylinder head. Take off the distributor if available for use then follow by the pulling of the timing chain tensioner or idler then apply a streak of paint at the area just holding the timed chain link on the timing mark of the cam sprocket. Loosen and remove the camshaft sprocket bolt and distributor drive gear while holding the intake camshaft with a wrench, and take out the camshaft sprocket and chain away. For the exhaust camshaft, compress the spring loaded sub gear with a service bolt, hold the exhaust camshaft in wrench to remove the bolt and distributor gear, and apply equal amount of loosening on the number 1 bearing cap bolt. The same procedure needs to be performed for the intake camshaft, labeling and storing of the lifters and shims for later use. Place the exhaust camshaft in a vise, with a crow's foot wrench loosen the tension on the sub-gear apply the following steps below; remove the snap ring, wave washer, sub gear and finally the camshaft gear spring. Remove the cam shaft gear and measure the free length of the gear spring.Then check all the the lifters for wear, Look at the cam lobes and the bearing journals for signs of wear or damage. Check also the oil clearance on the shaft and the journals with the help of Plastigage and measure the diameter of them and the width of the crushed Plastigage should also be measured too. Return the caps into place and check the end-play of the camshaft gears by turning them around. For installation, use camshaft installation lube on the lifters and the camshaft lobes; place the intake camshaft with the pin in the upwards direction and put the bearing caps in their appropriate positions. Loosen the intake bearing cap bolts, and after that participate in the installation of the snap ring and exhaust camshaft sub-gear accordingly as prescribed. Match the position of the camshaft gears by managing the dots and place the exhaust camshaft in its appropriate position, place the bearing caps. Torque the exhaust bearing cap bolts to 6.4 Lft.lbs, remove the camshaft service bolt and rotate to check for smoothness. Time the camshafts perpendicular to TDC, then fit the camshaft sprocket, the camshaft chain and finally the securing bolt. If fitted, fit the distributor gear and lock the securing bolt in place. Lastly, push down the plunger of the chain tensioner and turn it clockwise to install it On installating the chain make sure the engine is set to TDC for number one cylinder and check the valve clearance and ignition timing if at all required.
    Posted by ToyotaPartsDeal Specialist
    Q:
    What are the steps involved in the removal and installation of the camshaft in Four cylinder engine on 1995 through 2004 Toyota Tacoma? Posted by Customer
    A:
    When carrying out this procedure, use two service bolts, which are usually 6 x 1.0 mm bolts but 16 to 20 mm long . First, begin disconnecting the valve cover and setting the engine at TDC position for the number one cylinder, then aligning the marks found on the camshaft drive and the driven gears to the cylinder head or the valve cover mating surface. Check the camshaft thrust clearance by using the dial indicator measure; if the reading is above the service limit remove the camshaft or cylinder head. Take off the distributor if available for use then follow by the pulling of the timing chain tensioner or idler then apply a streak of paint at the area just holding the timed chain link on the timing mark of the cam sprocket. Loosen and remove the camshaft sprocket bolt and distributor drive gear while holding the intake camshaft with a wrench, and take out the camshaft sprocket and chain away. For the exhaust camshaft, compress the spring loaded sub gear with a service bolt, hold the exhaust camshaft in wrench to remove the bolt and distributor gear, and apply equal amount of loosening on the number 1 bearing cap bolt. The same procedure needs to be performed for the intake camshaft, labeling and storing of the lifters and shims for later use. Place the exhaust camshaft in a vise, with a crow's foot wrench loosen the tension on the sub-gear apply the following steps below; remove the snap ring, wave washer, sub gear and finally the camshaft gear spring. Remove the cam shaft gear and measure the free length of the gear spring.Then check all the the lifters for wear, Look at the cam lobes and the bearing journals for signs of wear or damage. Check also the oil clearance on the shaft and the journals with the help of Plastigage and measure the diameter of them and the width of the crushed Plastigage should also be measured too. Return the caps into place and check the end-play of the camshaft gears by turning them around. For installation, use camshaft installation lube on the lifters and the camshaft lobes; place the intake camshaft with the pin in the upwards direction and put the bearing caps in their appropriate positions. Loosen the intake bearing cap bolts, and after that participate in the installation of the snap ring and exhaust camshaft sub-gear accordingly as prescribed. Match the position of the camshaft gears by managing the dots and place the exhaust camshaft in its appropriate position, place the bearing caps. Torque the exhaust bearing cap bolts to 6.4 Lft.lbs, remove the camshaft service bolt and rotate to check for smoothness. Time the camshafts perpendicular to TDC, then fit the camshaft sprocket, the camshaft chain and finally the securing bolt. If fitted, fit the distributor gear and lock the securing bolt in place. Lastly, push down the plunger of the chain tensioner and turn it clockwise to install it On installating the chain make sure the engine is set to TDC for number one cylinder and check the valve clearance and ignition timing if at all required.
    Posted by ToyotaPartsDeal Specialist
    Q:
    How should the exhaust camshaft sub-gear be secured for the 1999 Toyota 4Runner? Posted by Customer
    A:
    Secure it to the driven gear with a service bolt installed in the threaded hole. Caution: Hold the camshafts level during removal to prevent damage.
    Posted by ToyotaPartsDeal Specialist
    Q:
    What is the final step in the installation process for the 1993 Toyota T100? Posted by Customer
    A:
    The remainder of the installation is the reverse of the removal procedure, including checking and adjusting the valve clearance and ignition timing if necessary.
    Posted by ToyotaPartsDeal Specialist
    Q:
    What is the installation process for the camshafts for the 1998 Toyota T100? Posted by Customer
    A:
    1. Reassemble the exhaust camshaft gear(s) and mount the camshaft in a padded vise. 2. Insert a service bolt into the unthreaded hole of the camshaft subgear and align the holes. 3. Install a second service bolt in the threaded hole and tighten it.
    Posted by ToyotaPartsDeal Specialist
    See expert answers on similar Camshaft
    Q:
    What is the procedure for removing the camshaft housing for the 2003 Toyota Tacoma? Posted by Customer
    A:
    Remove the camshaft housing and rear cover on the right bank camshaft by removing the retaining plate bolts.
    Posted by ToyotaPartsDeal Specialist
    If you have any questions about this product, please don't hesitate to ask us. We will be happy to help you!

Genuine Toyota Part 13054-62030, the Right Choice

To ensure reliability, purchase Toyota part # 13054-62030 CAMSHAFT Sub-Assembly. It is sometimes referred to as Toyota Camshaft. For unrivaled quality, OEM parts are the ultimate choice. These parts are manufactured by Toyota's official factory using top-quality materials and undergo strict testing procedures, ensuring outstanding dependability and long-lasting durability. This part fits 1996-2002 Toyota 4Runner, 1992-1994 Toyota Camry, 1995-2004 Toyota Tacoma, 2000-2005 Toyota Tundra.

ToyotaPartsDeal.com is a leading supplier of genuine Toyota parts and accessories such as Toyota 1305462030 CAMSHAFT Sub-Assembly. In need of OEM Toyota parts? Look no further than our extensive inventory of genuine Toyota parts, competitively priced to be highly exceptional in the market. They are all manufacturer-warrantied. Add to that, our easy return policy and swift delivery service, and your shopping experience promises to be the great pleasant ever. For detailed Toyota parts information, click here.

Why choose Toyota Parts Deal

  • Dedicated Service

    Your complete satisfaction is our #1 goal

  • Lowest Prices

    Best deals on genuine OE parts from dealerships

  • Fast Delivery

    Orders are processed and delivered promptly