Make sure this part fits

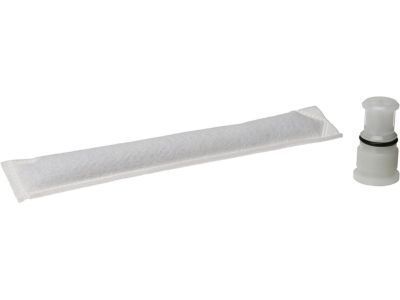
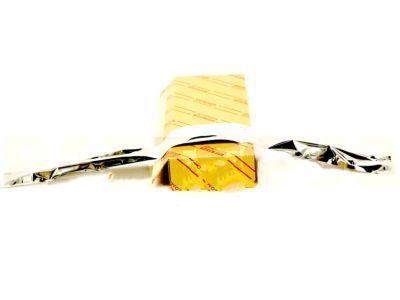
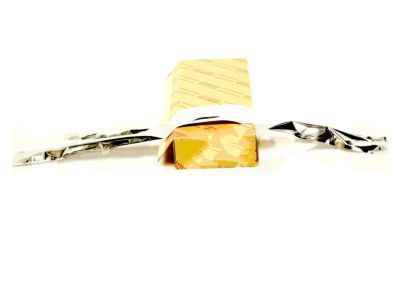
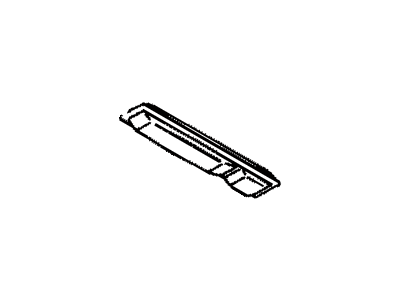
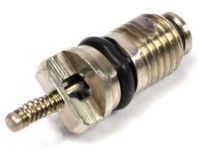
Toyota 88474-17010 Dryer, Cooler

2002-2022 Toyota 8847417010

Customer Questions & Expert Answers (12)
Toyota 88474-17010 Dryer, Cooler
  • Part Description
    Dryer, Cooler
  • Part Name Code
    88474
  • Replaces
    88474-08030
  • Manufacturer
    Toyota
Make sure this part fits
$91.92 MSRP: $129.57
You Save: $37.65 (30%)
Ships in 1-2 Business Days
1
ADD TO CART
  • Related Parts
  • Product Specifications
  • Vehicle Fitment
  • Customer Questions & Expert Answers
  • Product Specifications

    BrandGenuine Toyota
    Part Name Code88474
    Manufacturer Part Number88474-17010
    Part DescriptionDryer, Cooler
    Other NamesDehydrator, Drier
    Item Dimensions13.1 x 5.2 x 2.5 inches
    Item Weight0.80 Pounds
    ConditionNew
    Fitment TypeDirect Replacement
    Replaces88474-08030
    ManufacturerToyota
    SKU88474-17010
    WarrantyThis genuine Toyota part is guaranteed by Toyota's factory warranty.
    Shipping & ReturnShipping Policy Return Policy
    Warning: California’s Proposition 65
  • Vehicle Fitment

    Year Make Model Trim & Engine Important vehicle option details
    2012-2015 Scion iQ4 Cyl 1.3L1NRFE; 1NRFE; NGJ10L-BGXNGA
    2005-2010 Scion tCG|4 Cyl 2.4L2AZFE; 2AZFE; ANT10L-ALMGKA, ANT10L-ALPGKA
    2004-2006 Scion xA4 Cyl 1.5L1NZFE; 1NZFE; NCP61L-HHMNKA, NCP61L-HHPNKA
    2004-2006 Scion xB4 Cyl 1.5L1NZFE; 1NZFE; NCP31L-DHMNKA, NCP31L-DHPNKA
    2003-2022 Toyota 4RunnerLimited, SR5|4 Cyl 2.7L, 6 Cyl 4.0L, 8 Cyl 4.7L1GRFE, 2TRFE, 2UZFE; 1GRFE, 2TRFE, 2UZFE; GRN210L-GKAGKA, GRN210L-GKAZKA, GRN210L-GKPGKA, GRN210L-GKPZKA, GRN215L-GKAGKA, GRN215L-GKAZKA, GRN215L-GKPGKA, GRN215L-GKPZKA, GRN280L-GKAGKA, GRN285L-GKAGKA, TRN280L-GKPGKA, TRN285L-GKPGKA, UZN210L-GKAGKA, UZN210L-GKAZKA, UZN215L-GKAGKA, UZN215L-GKAZKA
    2005-2018 Toyota AvalonLimited, XL, XLE Premium, XLE Touring Or Touring, XLS|6 Cyl 3.5L2GRFE; 2GRFE; GSX30L-AEAGKA, GSX30L-AEANKA, GSX30L-AEAPKA, GSX30L-AETGKA, GSX30L-AETNKA, GSX30L-AETPKA, GSX40L-AETGKA, GSX40L-AETPKA, GSX40L-AETQKA
    2007-2017 Toyota CamryLE, N, SE, XLE, XSE|4 Cyl 2.4L, 4 Cyl 2.5L, 6 Cyl 3.5L2ARFE, 2AZFE, 2GRFE; 2ARFE, 2AZFE, 2GRFE; ACV40L-AEAGKA, ACV40L-AEANKA, ACV40L-AEMNKA, ACV40L-CEAGKA, ACV40L-CEANKA, ACV40L-CEASKA, ACV40L-CEMNKA, ACV40L-CEMSKA, ASV40L-AETGKA, ASV40L-AETNKA, ASV40L-CEFNKA, ASV40L-CEFSKA, ASV40L-CETGKA, ASV40L-CETNKA, ASV40L-CETSKA, ASV50L-CETEKA, ASV50L-CETGKA, ASV50L-CETNKA, ASV50L-CETPKA, ASV50L-CETSKA, GSV40L-AETGKA, GSV40L-AETNKA, GSV40L-CETGKA, GSV40L-CETNKA, GSV40L-CETSKA, GSV50L-CETGKA, GSV50L-CETSKA
    2002-2005 Toyota Celica4 Cyl 1.8L1ZZFE, 2ZZGE; 1ZZFE, 2ZZGE; ZZT230L-BLMSHA, ZZT230L-BLPSHA, ZZT231L-BLFVFA, ZZT231L-BLPVFA
    2003-2019 Toyota CorollaCE, ECO, ECOSW, LE, S, STD, XR, XRS|4 Cyl 1.8L, 4 Cyl 2.4L1ZZFE, 2AZFE, 2ZRFAE, 2ZRFE, 2ZZGE; 1ZZFE, 2AZFE, 2ZRFAE, 2ZRFE, 2ZZGE; AZE141L-DEASKA, AZE141L-DEASKK, AZE141L-DEMSKA, AZE141L-DEMSKK, ZRE142L-DEMDKA, ZRE142L-DEMDKK, ZRE142L-DEMSKA, ZRE142L-DEMSKK, ZRE142L-DEPDKA, ZRE142L-DEPDKK, ZRE142L-DEPNKA, ZRE142L-DEPNKK, ZRE142L-DEPSKA, ZRE142L-DEPSKK, ZRE172L-DEFDKA, ZRE172L-DEFDKK, ZRE172L-DEFSKA, ZRE172L-DEFSKK, ZRE172L-DEPDKA, ZRE172L-DEPDKK, ZRE172L-DEXDKA, ZRE172L-DEXDKK, ZRE172L-DEXNKA, ZRE172L-DEXNKK, ZRE172L-DEXPPA, ZRE172L-DEXPPK, ZRE172L-DEXQPA, ZRE172L-DEXQPK, ZRE172L-DEXSKA, ZRE172L-DEXSKK, ZZE130L-AEMDKA, ZZE130L-AEMNKA, ZZE130L-AEPDKA, ZZE130L-AEPDKK, ZZE130L-AEPNKA, ZZE130L-AEPNKK, ZZE130L-DEMDKA, ZZE130L-DEMDKK, ZZE130L-DEMNKA, ZZE130L-DEMNKK, ZZE130L-DEMSKA, ZZE130L-DEMSKK, ZZE130L-DEPDKA, ZZE130L-DEPDKK, ZZE130L-DEPNKA, ZZE130L-DEPNKK, ZZE130L-DEPSKA, ZZE130L-DEPSKK, ZZE131L-DEFSFA, ZZE131L-DEFSFK, ZZE132L-DHMDKA, ZZE132L-DHMDKK, ZZE132L-DHMNKA, ZZE132L-DHMNKK, ZZE132L-DHPDKA, ZZE132L-DHPDKK, ZZE132L-DHPNKA, ZZE132L-DHPNKK, ZZE133L-DHFSFA, ZZE133L-DHFSFK, ZZE133L-DHPSFA, ZZE133L-DHPSFK, ZZE134L-DHPDKA, ZZE134L-DHPDKK, ZZE134L-DHPNKA, ZZE134L-DHPNKK
    2002-2005 Toyota Echo4 Cyl 1.5L1NZFE; 1NZFE; NCP12L-BDMRKA, NCP12L-BDMRKK, NCP12L-BDPRKA, NCP12L-BDPRKK, NCP12L-BEMRKA, NCP12L-BEMRKK, NCP12L-BEPRKA, NCP12L-BEPRKK, NCP13L-AGMRKK, NCP13L-AGPRKK, NCP13L-AHMRKK, NCP13L-AHPRKK
    View More
  • Customer Questions & Expert Answers

    Q:
    I just want to confirm I'm purchasing a correct part before placing an order Posted by ToyotaPartsDeal Specialist
    A:
    You can Select Your Vehicle to check if 88474-17010 fits your vehicle.
    Posted by ToyotaPartsDeal Specialist
    Q:
    How to replace the receiver/drier in an air conditioning system on Toyota Camry? Posted by Customer
    A:
    Have the refrigerant discharged by an air conditioning technician, then disconnect the cable from the negative battery terminal. Remove the condenser using an Allen wrench to detach the end plug; after the system has been discharged, remove the Allen plug and pull the A/C Accumulator from the tube on the condenser, then take out the A/C Accumulator. Installation is the reverse of removal, ensuring to tighten the end plug to the specified torque. Finally, have the system evacuated, charged, and leak tested by the shop that discharged it, and if the A/C Accumulator was replaced, ensure they add the proper amount of refrigeration oil to the compressor, using only compressor oil compatible with R-134a refrigerant.
    Posted by ToyotaPartsDeal Specialist
    Q:
    How to remove and install a drier in air conditioning system on 2003 through 2009 Toyota 4Runner? Posted by Customer
    A:
    Take the vehicle to a dealer service department or automotive air conditioning shop and have the air conditioning system discharged and the refrigerant recovered. Using an Allen wrench, detach the end plug and remove the A/C Accumulator from the condenser with a pair of needle-nose pliers after the system has been discharged. Use new O-rings when installing the new A/C Accumulator and tighten the end plug securely. Be sure to lubricate the O-rings with R-134a compatible refrigerant oil. Installation is the reverse of removal. Have the system evacuated, charged and leak tested by the shop that discharged it.
    Posted by ToyotaPartsDeal Specialist
    Q:
    How to replace a receiver/drier in air conditioning system on 2002 through 2006 Toyota Avalon? Posted by Customer
    A:
    Some models have a traditional A/C accumulator, which is mounted at the right front of the engine compartment. Models that do not have a separate A/C accumulator have one that is built into the side of the condenser. First, have the refrigerant discharged by an air conditioning technician. Then, disconnect the negative battery cable. If the A/C accumulator is integral with the condenser, use an Allen wrench to detach the end plug and remove the accumulator from the condenser with a pair of needle-nose pliers. Use new O-rings when installing the new accumulator and tighten the end plug. Be sure to lubricate the O-rings with R-134a compatible refrigerant oil. Installation is the reverse of removal. If the A/C accumulator is separate, disconnect the refrigerant lines from the A/C accumulator and cap the open fittings to prevent the entry of moisture. Unscrew the two mounting bolts and remove the A/C accumulator. Loosen the clamp bolt and slide the A/C accumulator out of the bracket. Install the new A/C accumulator by reversing the removal procedure. If a new A/C accumulator is being installed, add 20cc (0.71 ounce) of R-134a compatible refrigerant oil to it before connecting the lines. Be sure to install new O-rings on the refrigerant lines, and lubricate them with R-134a compatible refrigerant oil, before connecting the lines. Finally, have the system evacuated, charged, and leak tested by the shop that discharged it.
    Posted by ToyotaPartsDeal Specialist
    Q:
    How to remove and install a receiver-drier in a Toyota Corolla air conditioning system? Posted by Customer
    A:
    To remove the A/C accumulator, the refrigerant must be discharged and recovered from the system. Located on the passenger's side of the vehicle, at the end of the condenser, the A/C accumulator can be removed by using an Allen wrench to remove the large plug at the bottom. The filter-drier element inside can then be extracted with needle-nose pliers. For installation, follow the reverse order, ensuring the plug's O-ring is lubricated with refrigerant oil. The system must be evacuated, charged, and leak tested. If the A/C accumulator or A/C Condenser was replaced, new refrigeration oil compatible with R-134a refrigerant must be added.
    Posted by ToyotaPartsDeal Specialist
    Q:
    How to remove and install the receiver-drier in a Toyota Matrix air conditioning system? Posted by Customer
    A:
    To remove the A/C accumulator from the vehicle, which is mounted on the passenger's side at the end of the A/C Condenser, you must first have the refrigerant discharged and recovered. Afterward, you need to remove the large plug at the bottom of the A/C accumulator. This can be done by using needle-nose pliers to grip and extract the filter-drier element inside the accumulator. For the installation process, essentially reverse the removal steps. Begin by inserting a new element and lightly lubricating the plug's O-ring with a bit of refrigerant oil. Finally, it's necessary to have the system evacuated, charged, and leak tested. If the A/C accumulator or condenser was replaced with a new unit, you should add new refrigeration oil to the system. Ensure to use only refrigerant oil that is compatible with R-134a refrigerant.
    Posted by ToyotaPartsDeal Specialist
    Q:
    How to remove and install the receiver/drier component on Toyota Sienna? Posted by Customer
    A:
    This component is only on 2006 and earlier models. On later models, it is an integral part of the condenser. First, have the refrigerant discharged by an air conditioning technician. Then, disconnect the negative battery cable. After the system has been discharged, unbolt the two refrigerant lines from the A/C accumulator and cap them to prevent entry of moisture. Next, loosen the clamp bolt and slip the A/C accumulator out of the bracket. Installation is the reverse of removal. Finally, have the system evacuated, charged, and leak tested by the shop that discharged it. If the A/C accumulator was replaced, have them add about 20 cc (0.71 oz) of refrigeration oil to the compressor. Use only compressor oil compatible with R-134a refrigerant.
    Posted by ToyotaPartsDeal Specialist
    Q:
    How to replace the filter-drier element in a Toyota Prius air conditioning system? Posted by Customer
    A:
    To replace the A/C accumulator and condenser in an air conditioning system, follow these steps. Firstly, have the refrigerant discharged and recovered by an air conditioning technician. The A/C Condenser, located adjacent to the radiator, needs to be removed from the vehicle. Use an Allen wrench to remove the large plug from the A/C accumulator and then use needle-nose pliers to extract the filter-drier element inside the A/C accumulator. When reinstalling, ensure the new filter-drier element is properly in place and lubricate the plug's O-ring with refrigerant oil. Once the replacement is complete, have the system evacuated, charged, and leak tested by the same shop that discharged the refrigerant. If the A/C accumulator or condenser was replaced, make sure to add new refrigeration oil to the system. It is essential to use refrigerant oil that is compatible with the refrigerant being used.
    Posted by ToyotaPartsDeal Specialist
    Q:
    How to remove and replace a A/C Accumulator in an air conditioning system for Toyota Tundra? Posted by Customer
    A:
    Firstly, ensure the refrigerant is discharged by an air conditioning technician. Then, disconnect the cable from the negative battery terminal. Proceed to remove the condenser and using an Allen wrench, detach the end plug and remove the A/C Accumulator from the A/C Condenser. To secure the end plug, ensure it's tightened properly. Finally, have the system evacuated, charged, and leak tested by the same shop that discharged it. If the receiver was replaced, request them to add the proper amount of refrigeration oil to the compressor. Only use A/C Compressor oil that is compatible with R-134a refrigerant.
    Posted by ToyotaPartsDeal Specialist
    Q:
    What should be done with the battery before proceeding with the removal for the 2007 Toyota Avalon? Posted by Customer
    A:
    Disconnect the cable from the negative battery terminal.
    Posted by ToyotaPartsDeal Specialist
    Q:
    What is the first step to take before working on the air conditioning system for the 2007 Toyota Highlander? Posted by Customer
    A:
    Have the refrigerant discharged by an air conditioning technician.
    Posted by ToyotaPartsDeal Specialist
    See expert answers on similar A/C Accumulator
    Q:
    How should the end plug be secured for the 2012 Toyota Sequoia? Posted by Customer
    A:
    The end plug should be tightened properly to secure it.
    Posted by ToyotaPartsDeal Specialist
    See expert answers on similar A/C Accumulator
    If you have any questions about this product, please don't hesitate to ask us. We will be happy to help you!

Genuine Toyota Part 88474-17010, the Right Choice

To ensure reliability, purchase Toyota part # 88474-17010 Dryer, Cooler. It is sometimes referred to as Toyota A/C Accumulator. For unrivaled quality, OEM parts are the ultimate choice. These parts are manufactured by Toyota's official factory using top-quality materials and undergo strict testing procedures, ensuring outstanding dependability and long-lasting durability. This part fits 2003-2022 Toyota 4Runner, 2005-2018 Toyota Avalon, 2007-2017 Toyota Camry, 2008-2019 Toyota Highlander.

ToyotaPartsDeal.com is a leading supplier of genuine Toyota parts and accessories such as Toyota 8847417010 Dryer, Cooler. In need of OEM Toyota parts? Look no further than our extensive inventory of genuine Toyota parts, competitively priced to be highly exceptional in the market. They are all manufacturer-warrantied. Add to that, our easy return policy and swift delivery service, and your shopping experience promises to be the great pleasant ever. For detailed Toyota parts information, click here.

Why choose Toyota Parts Deal

  • Dedicated Service

    Your complete satisfaction is our #1 goal

  • Lowest Prices

    Best deals on genuine OE parts from dealerships

  • Fast Delivery

    Orders are processed and delivered promptly