This part fits the vehicle you selected:
My Vehicle: 5TELU42N56Z291220 2006 Toyota Tacoma United States Of America; 6 Cyl 4.0L DOHC EFI; Base; 5-Speed Automatic Transmission; Double Cab; GRN245L-PRADKA
Change VehicleThe vehicle options this part fits:
- Production Date: 04/2005-05/2008
- Fitting Vehicle Options: GRN225, 245, 250, 265, 270, TRN22#, 24#, 26#
Toyota 83320-04021 Gage Assy, Fuel Sender
2005-2013 Toyota Tacoma 8332004021
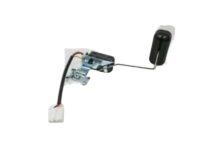


- Part DescriptionGage Assy, Fuel Sender
- Part Name Code83320
- Replaced By83320-04030
- ManufacturerToyota
This part fits the vehicle you selected:
5TELU42N56Z291220 2006 Toyota Tacoma United States Of America; 6 Cyl 4.0L DOHC EFI; Base; 5-Speed Automatic Transmission; Double Cab; GRN245L-PRADKA
The vehicle options this part fits:
- Production Date: 04/2005-05/2008
- Fitting Vehicle Options: GRN225, 245, 250, 265, 270, TRN22#, 24#, 26#
$101.92 MSRP: $143.66 1
You Save: $41.74 (30%)
Ships in 1-2 Business Days
Product Specifications
| Brand | Genuine Toyota |
| Part Name Code | 83320 |
| Manufacturer Part Number | 83320-04021 |
| Part Description | Gage Assy, Fuel Sender |
| Item Dimensions | 14.6 x 10.6 x 4.6 inches |
| Item Weight | 1.90 Pounds |
| Condition | New |
| Fitment Type | Direct Replacement |
| Manufacturer | Toyota |
| SKU | 83320-04021 |
| Warranty | This genuine Toyota part is guaranteed by Toyota's factory warranty. |
| Shipping & Return | Shipping Policy Return Policy |
Warning: California’s Proposition 65
Customer Questions & Answers
- Q:I just want to confirm I'm purchasing a correct part before placing an order Posted by ToyotaPartsDeal Specialist
- A:You can Select Your Vehicle to check if 83320-04021 fits your vehicle.Posted by ToyotaPartsDeal Specialist
- Q:How to replace the fuel pump/fuel gauge sending unit? Posted by Customer
- A:Remove the fuel tank and remove the fuel pump/fuel gauge sending unit from the tank.Disconnect the fuel gauge sending unit electrical connector.To detach the fuel gauge sending unit from the pump sub-tank, release the lock tab and slide the sending unit down.To install the fuel gauge sending unit on the sub-tank, align the T-shaped recess in the underside of the fuel gauge sending unit with the T-shape lug on the sub-tank, then lit the gauge on the sub-tank and push down until the lock tab snaps into place.Install the fuel pump/fuel gauge sending unit into the tank and install the fuel tank.Disconnect the upper end of the fuel pump harness from the underside of the fuel pump module mounting flange.Using three screwdrivers, disengage the three claw fittings that secure the sub-tank to the lower end of the fuel pump module mounting flange assembly, then remove the fuel filter assembly from the fuel sub-tank.Using screwdrivers, disengage the two claw fittings that secure the fuel filter housing/fuel pump/fuel pressure regulator assembly to the wall of the sub-tank, pull the filler/pump/pressure regulator out of the sub-tank and disconnect the electrical connector from the fuel pump.Using a screwdriver, disengage the three claw fittings that secure the inlet strainer to the fuel filter housing and the two claw fittings that secure the strainer to the fuel pressure regulator, then pull the inlet strainer off the lower end of the fuel pump.Pull the fuel pump out of the fuel filter housing, pull the harness through the upper end of the filter housing, then disconnect the harness connector from the upper end of the fuel pump. 1To remove the fuel pressure regulator from the fuel filter housing, simply pull it out. Inspect the condition of the two pressure regulator 0-rings.Reassembly is the reverse of disassembly.Posted by ToyotaPartsDeal Specialist
- Q:How to remove and install a fuel gauge sending unit and fuel pump? Posted by Customer
- A:Relieve the system fuel pressure. Remove the fuel tank. Disconnect the fuel supply and return line quick-connect fittings from the fuel pump/fuel gauge sending unit module by sliding back the yellow locking retainers and pulling up on the fittings. Note how the fuel and supply lines are routed across the top of the fuel tank, then detach them from the tank. Using a suitable tool, unscrew the retainer ring. As you turn the ring, bend each locking tab to clear the locking lugs. Carefully withdraw the fuel pump/fuel gauge sending unit assembly from the fuel tank. Make sure you don't damage the fuel pump filter or bend the sending unit float arm. Remove and inspect the fuel pump/fuel gauge sending unit 0-ring. If the 0-ring is cracked, torn or deteriorated, replace it. If you want to replace either the fuel pump or the fuel gauge sending unit, proceed accordingly. If you have been experiencing fuel delivery problems, disassemble the pump assembly while the pump is removed and inspect the pump inlet strainer. Make sure that it's not clogged or damaged. If the strainer is dirty, try washing it in clean solvent. If it's still clogged, replace the pump assembly. When installing the fuel pump/fuel gauge sending unit, make sure that the locator lug on the edge of the pump mounting flange is aligned with the notch in the pump mounting ring. When tightening the retainer ring, screw it down a couple of turns, then turn it so that the alignment mark on the ring is positioned between the two arrows on the fuel tank. Installation is otherwise the reverse of removal.Posted by ToyotaPartsDeal Specialist
If you have any questions about this product, please don't hesitate to ask us. We will be happy to help you!
Why choose Toyota Parts Deal
- Dedicated Service
Your complete satisfaction is our #1 goal
- Lowest Prices
Best deals on genuine OE parts from dealerships
- Fast Delivery
Orders are processed and delivered promptly