Make sure this part fits

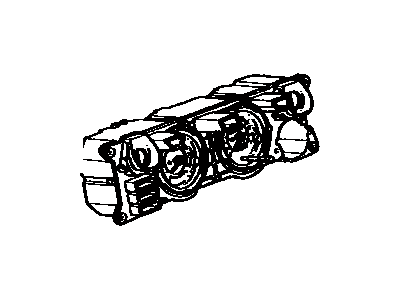
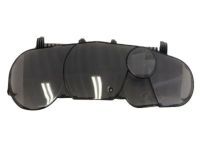
Toyota 83800-0C730 Meter Assy, Combination

2008-2009 Toyota Sequoia 838000C730

Customer Questions & Expert Answers (3)
Toyota 83800-0C730 Meter Assy, Combination
  • Part Description
    Meter Assy, Combination
  • Part Name Code
    83100
  • Manufacturer
    Toyota
  • Manufacturer's Notes
    This part is discontinued.
Make sure this part fits
  • Related Parts
  • Product Specifications
  • Vehicle Fitment
  • Customer Questions & Expert Answers
  • Product Specifications

    BrandGenuine Toyota
    Part Name Code83100
    Manufacturer Part Number83800-0C730
    Part DescriptionMeter Assy, Combination
    Other NamesInstrument Cluster
    Item Dimensions18.0 x 10.1 x 8.2 inches
    Item Weight2.60 Pounds
    ConditionNew
    Fitment TypeDirect Replacement
    ManufacturerToyota
    SKU83800-0C730
    WarrantyThis genuine Toyota part is guaranteed by Toyota's factory warranty.
    Shipping & ReturnShipping Policy Return Policy
    Warning: California’s Proposition 65
  • Vehicle Fitment

    Year Make Model Trim & Engine Important vehicle option details
    2008-2009 Toyota SequoiaLimited, Platinum, SR5|8 Cyl 4.6L, 8 Cyl 4.7L, 8 Cyl 5.7L1URFE, 2UZFE, 3URFBE, 3URFE; 1URFE, 2UZFE, 3URFBE, 3URFE; UCK60L-GKALKA, UCK60L-GKASKA, UCK65L-GKALKA, UCK65L-GKASKA, UPK60L-GKTLKA, UPK60L-GKTSKA, UPK65L-GKTLKA, UPK65L-GKTSKA, USK60L-GKTLKA, USK60L-GKTSKA, USK60L-GKTZKA, USK65L-GKTLGA, USK65L-GKTLKA, USK65L-GKTSGA, USK65L-GKTSKA, USK65L-GKTZGA, USK65L-GKTZKA
  • Customer Questions & Expert Answers

    Q:
    I just want to confirm I'm purchasing a correct part before placing an order Posted by ToyotaPartsDeal Specialist
    A:
    You can Select Your Vehicle to check if 83800-0C730 fits your vehicle.
    Posted by ToyotaPartsDeal Specialist
    Q:
    Is the procedure for removing the instrument panel difficult for the home mechanic on Toyota Sequoia? Posted by Customer
    A:
    An inconvenience in this procedure that makes the home mechanics find it unbearable is that some bolts are obscured, and the metal works require awkward angles, in addition, there are various electrical connectors that require tagging and then disconnected. Therefore it is recommended only for those who have prior experience on their own house repairs. A lot of attention should be paid during the removal of the instrument panel to note the order and position of each component to enable a correct fix. However, it is recommended to remove both front seats, although they are not necessary for working; it gives more working space and less chance of scratching. First, unplug the cable from the negative terminal of battery, then take out the dashboard trim panels, and the center floor console. If mated, remove the driver's side knee airbag connector, remove the mounting bolts of the knee airbag, and then remove the airbag. Then, take out the instrument cluster, glove compartment, as well as the storage box. Pull off the instrument panel lower side and console trim, wrinkles and A-pillar trim panels and then disengage the passenger airbag connector and finally, taking out the audio unit from the panel of the car's dash. Take out the a/c control panel and locate the end cap, unscrew the reinforcement tube mount bolts. Remove the bolts holding the steering column and moved it down off of the instrument panel. Remove several electrical connectors and make sure that they would not be interchanged by using masking tape in labeling the various chords. Pop off the speaker trim covers and the defroster trim panel, and then disconnect the optical sensor's harness connector. Turn all nuts secured with the instrument panel to the body, tilt the panel and draw it backward to extract out along the driver's door opening. If the instrument panel reinforcement tube is also being removed, if any interfering connectors is present they need to be disconnected, the wires harness need to be unplug and the FASTENERS for the tube need to be removed and removal of the tube through the driver's door opening is done. Its removal is in the reverse sequence as installation.
    Posted by ToyotaPartsDeal Specialist
    Q:
    What should be done after removing the instrument cluster trim bezel for the 2011 Toyota Sequoia? Posted by Customer
    A:
    Remove the instrument cluster retaining screws, pull out the cluster, and unplug the electrical connectors from the cluster.
    Posted by ToyotaPartsDeal Specialist
    If you have any questions about this product, please don't hesitate to ask us. We will be happy to help you!

Genuine Toyota Part 83800-0C730, the Right Choice

To ensure reliability, purchase Toyota part # 83800-0C730 Meter Assy, Combination. It is sometimes referred to as Toyota Instrument Cluster, Toyota Speedometer. For unrivaled quality, OEM parts are the ultimate choice. These parts are manufactured by Toyota's official factory using top-quality materials and undergo strict testing procedures, ensuring outstanding dependability and long-lasting durability. This part fits 2008-2009 Toyota Sequoia.

ToyotaPartsDeal.com is a leading supplier of genuine Toyota parts and accessories such as Toyota 838000C730 Meter Assy, Combination. In need of OEM Toyota parts? Look no further than our extensive inventory of genuine Toyota parts, competitively priced to be highly exceptional in the market. They are all manufacturer-warrantied. Add to that, our easy return policy and swift delivery service, and your shopping experience promises to be the great pleasant ever. For detailed Toyota parts information, click here.

Why choose Toyota Parts Deal

  • Dedicated Service

    Your complete satisfaction is our #1 goal

  • Lowest Prices

    Best deals on genuine OE parts from dealerships

  • Fast Delivery

    Orders are processed and delivered promptly