Make sure this part fits

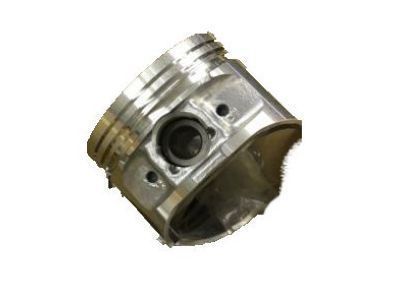
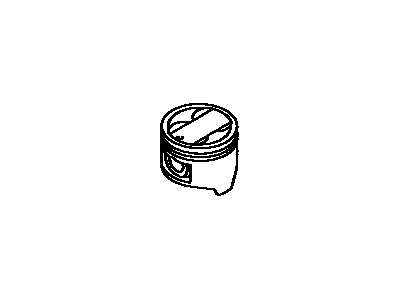
Toyota 13101-74130-01 Piston Sub-Assy, W/Pin

1991-1999 Toyota 131017413001

Customer Questions & Expert Answers (4)
Toyota 13101-74130-01 Piston Sub-Assy, W/Pin
  • Part Description
    Piston Sub-Assy, W/Pin
  • Part Name Code
    13101
  • Replaces
    13101-03030-01, 13101-03050-01
  • Manufacturer
    Toyota
Make sure this part fits
$109.65 MSRP: $154.56
You Save: $44.91 (30%)
Ships in 1-3 Business Days
1
ADD TO CART
  • Related Parts
  • Product Specifications
  • Vehicle Fitment
  • Customer Questions & Expert Answers
  • Product Specifications

    BrandGenuine Toyota
    Part Name Code13101
    Manufacturer Part Number13101-74130-01
    Part DescriptionPiston Sub-Assy, W/Pin
    Other NamesPiston
    Item Dimensions4.2 x 3.8 x 3.5 inches
    Item Weight1.20 Pounds
    ConditionNew
    Fitment TypeDirect Replacement
    Replaces13101-03030-01, 13101-03050-01
    Require Quantity4
    ManufacturerToyota
    SKU13101-74130-01
    WarrantyThis genuine Toyota part is guaranteed by Toyota's factory warranty.
    Shipping & ReturnShipping Policy Return Policy
    Warning: California’s Proposition 65
  • Vehicle Fitment

    Year Make Model Trim & Engine Important vehicle option details
    1992-1998 Toyota CamryCE, DX, LE, SE, XLE|4 Cyl 2.2L, 6 Cyl 3.0L1MZFE, 3VZFE, 5SFE; 1MZFE, 3VZFE, 5SFE; MCV10L-AEPDKK, 5SFE; MCV10L-CCPNKA, MCV10L-AEPGKA, MCV10L-AEPNKA, MCV10L-AEPNKK, MCV10L-AEPSKA, MCV10L-CCPNKA, MCV10L-CCPNKK, MCV10L-CCPSKA, MCV10L-CEPDKK, MCV10L-CEPGKA, MCV10L-CEPNKA, MCV10L-CEPNKK, MCV10L-CEPSKA, MCV10L-CWPNKA, MCV10L-CWPNKK, MCV20L-AEPDKK, MCV20L-AEPGKA, MCV20L-AEPGKK, MCV20L-AEPNKA, MCV20L-CEMDKA, MCV20L-CEMNKA, MCV20L-CEPDKK, MCV20L-CEPGKA, MCV20L-CEPGKK, MCV20L-CEPNKA, MCV20L-CEPNKK, SXV10L-AEMDKA, SXV10L-AEMDKK, SXV10L-AEMNKK, SXV10L-AEPDKA, SXV10L-AEPDKK, SXV10L-AEPGKA, SXV10L-AEPNKA, SXV10L-AEPNKK, SXV10L-CCMDKA, SXV10L-CCMDKK, SXV10L-CCMNKK, SXV10L-CCPDKA, SXV10L-CCPDKK, SXV10L-CCPNKA, SXV10L-CCPNKK, SXV10L-CEMDKA, SXV10L-CEMDKK, SXV10L-CEMNKK, SXV10L-CEPDKA, SXV10L-CEPDKK, SXV10L-CEPGKA, SXV10L-CEPNKA, SXV10L-CEPNKK, SXV10L-CWMDKK, SXV10L-CWPDKA, SXV10L-CWPDKK, SXV10L-CWPNKA, SXV10L-CWPNKK, SXV20L-AEMDKK, SXV20L-AEPDKK, SXV20L-AEPGKA, SXV20L-AEPNKA, SXV20L-AEPNKK, SXV20L-CEMDKA, SXV20L-CEMDKK, SXV20L-CEMNKK, SXV20L-CEPDKA, SXV20L-CEPDKK, SXV20L-CEPGKA, SXV20L-CEPNKA, SXV20L-CEPNKK, VCV10L-AEMNKK, VCV10L-AEMSKA, VCV10L-AEPDKA, VCV10L-AEPDKK, VCV10L-AEPGKA, VCV10L-AEPNKA, VCV10L-AEPNKK, VCV10L-AEPSKA, VCV10L-CEMSKA, VCV10L-CEPDKA, VCV10L-CEPGKA, VCV10L-CEPNKA, VCV10L-CEPSKA, VCV10L-CWPNKA, VCV10L-CWPNKK
    1991-1999 Toyota CelicaGT, GTS, ST, Turbo 4WD, Turbo All Trac|4 Cyl 1.6L, 4 Cyl 1.8L, 4 Cyl 2.0L, 4 Cyl 2.2L3SGTE, 4AFE, 5SFE, 7AFE; 3SGTE, 4AFE, 5SFE, 7AFE; AT180L-BCMSKA, AT180L-BCMSKK, AT180L-BCPSKA, AT180L-BCPSKK, AT200L-BCMSKA, AT200L-BCPSKA, AT200L-BLMSKA, AT200L-BLMSKK, AT200L-BLPSKA, AT200L-BLPSKK, ST184L-BCMGKA, ST184L-BCMGKK, ST184L-BCPGKA, ST184L-BCPGKK, ST184L-BKMGKA, ST184L-BKPGKA, ST184L-BLMGKA, ST184L-BLMGKK, ST184L-BLMVKA, ST184L-BLMVKK, ST184L-BLPGKA, ST184L-BLPGKK, ST184L-BLPVKA, ST184L-BLPVKK, ST185L-BLMVZA, ST185L-BLMVZK, ST204L-BCMGKA, ST204L-BCMGKK, ST204L-BCMSKA, ST204L-BCPGKA, ST204L-BCPGKK, ST204L-BCPSKA, ST204L-BKMGKA, ST204L-BKPGKA, ST204L-BLMGKA, ST204L-BLMGKK, ST204L-BLMSKA, ST204L-BLPGKA, ST204L-BLPGKK, ST204L-BLPSKA
    1992-1995 Toyota MR24 Cyl 2.0L, 4 Cyl 2.2L3SGTE, 5SFE; 3SGTE, 5SFE; SW20L-ACMZZA, SW20L-AJMZZA, SW20L-AJMZZK, SW21L-ACMZKA, SW21L-ACPZKA, SW21L-AJMZKA, SW21L-AJMZKK, SW21L-AJPZKA
  • Customer Questions & Expert Answers

    Q:
    Does it fit my car? Posted by ToyotaPartsDeal Specialist
    A:
    You can Select Your Vehicle to check if 13101-74130-01 fits your vehicle.
    Posted by ToyotaPartsDeal Specialist
    Q:
    How to install piston/connecting rod assemblies on Toyota Celica? Posted by Customer
    A:
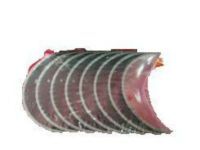
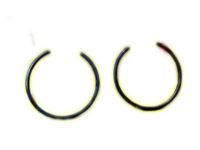
    Before installing the piston and connecting rod assemblies, ensure the cylinder walls are clean, the top edge of each cylinder is chamfered, and the crankshaft is in place. Remove the cap from the number one connecting rod, take out the original bearing inserts, and wipe the bearing surfaces with a clean, lint-free cloth. Clean the back side of the new upper bearing insert and lay it in place in the connecting rod, ensuring the tab fits into the recess and the oil holes align without hammering or lubricating the bearing. Clean the back side of the other bearing insert and install it in the rod cap, again ensuring the tab fits into the recess without lubrication. Stagger the piston ring gaps around the piston, slip a section of hose over each connecting rod cap bolt, lubricate the piston and rings with clean engine oil, and attach a piston ring compressor, leaving the skirt protruding about 1/4-inch. Rotate the crankshaft until the number one connecting rod journal is at bottom dead center and apply engine oil to the cylinder walls. With the dimple on top of the piston facing the front of the engine, gently insert the piston/connecting rod assembly into the number one cylinder bore, resting the bottom edge of the ring compressor on the engine block. Tap the top edge of the ring compressor to ensure contact with the block, then gently tap the top of the piston with a wooden hammer handle while guiding the connecting rod into place on the crankshaft journal, being cautious of any resistance. After installation, check the connecting rod bearing oil clearance before permanently bolting the rod cap in place by laying a piece of Plastigage on the number one connecting rod journal and cleaning the rod cap bearing face. Install the rod cap, ensuring the mating marks align, and apply a light coat of oil to the nuts before tightening them to the specified torque in three steps. Remove the nuts and detach the rod cap carefully to avoid disturbing the Plastigage, then compare the width of the crushed Plastigage to the scale to obtain the oil clearance. If the clearance is not as specified, check for dirt or oil between the bearing inserts and the connecting rod or cap, and recheck the journal diameter. Carefully scrape off any Plastigage material from the rod journal and bearing face without scratching the bearing, then apply a uniform layer of clean moly-base grease or engine assembly lube to both bearing faces. Slide the connecting rod back into place on the journal, remove the protective hoses, install the rod cap, and tighten the nuts to the specified torque, repeating the procedure for the remaining pistons and connecting rods. Important points include keeping the bearing inserts and connecting rods clean, ensuring the correct piston/rod assembly for each cylinder, having the dimple on the piston face the front of the engine, lubricating the cylinder walls, and lubricating the bearing faces when installing the rod caps. After all assemblies are installed, rotate the crankshaft by hand to check for binding, and finally, check the connecting rod endplay, comparing the measured endplay to the specifications to ensure correctness. If new rods or a new crankshaft were installed, inadequate endplay may require removal of the rods for resizing at an automotive machine shop.
    Posted by ToyotaPartsDeal Specialist
    Q:
    When is it unnecessary to replace the pistons for the 1989 Toyota Celica? Posted by Customer
    A:
    If the pistons and cylinder walls are not damaged or excessively worn, and if the engine block is not rebored, new pistons are not necessary. However, new piston rings should always be used when an engine is rebuilt.
    Posted by ToyotaPartsDeal Specialist
    Q:
    How can you protect the crankshaft journal and cylinder wall during piston removal for the 1996 Toyota Celica? Posted by Customer
    A:
    Slip a short length of plastic or rubber hose over each connecting rod cap bolt to protect the crankshaft journal and cylinder wall as the piston is removed.
    Posted by ToyotaPartsDeal Specialist
    If you have any questions about this product, please don't hesitate to ask us. We will be happy to help you!

Genuine Toyota Part 13101-74130-01, the Right Choice

To ensure reliability, purchase Toyota part # 13101-74130-01 Piston Sub-Assy, W/Pin. It is sometimes referred to as Toyota Piston. For unrivaled quality, OEM parts are the ultimate choice. These parts are manufactured by Toyota's official factory using top-quality materials and undergo strict testing procedures, ensuring outstanding dependability and long-lasting durability. This part fits 1992-1998 Toyota Camry, 1991-1999 Toyota Celica, 1992-1995 Toyota MR2.

ToyotaPartsDeal.com is a leading supplier of genuine Toyota parts and accessories such as Toyota 131017413001 Piston Sub-Assy, W/Pin. In need of OEM Toyota parts? Look no further than our extensive inventory of genuine Toyota parts, competitively priced to be highly exceptional in the market. They are all manufacturer-warrantied. Add to that, our easy return policy and swift delivery service, and your shopping experience promises to be the great pleasant ever. For detailed Toyota parts information, click here.

Why choose Toyota Parts Deal

  • Dedicated Service

    Your complete satisfaction is our #1 goal

  • Lowest Prices

    Best deals on genuine OE parts from dealerships

  • Fast Delivery

    Orders are processed and delivered promptly