Make sure this part fits

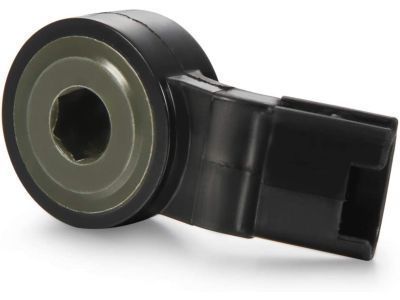
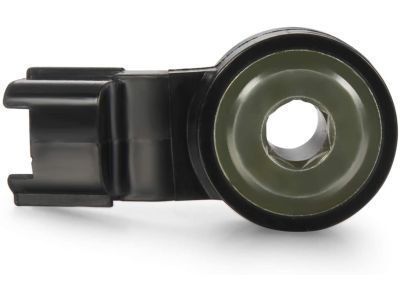
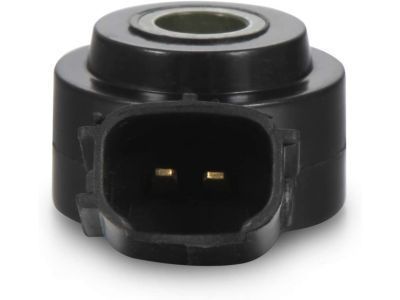
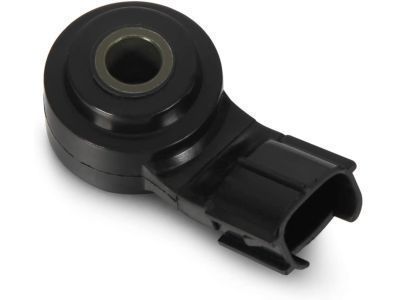
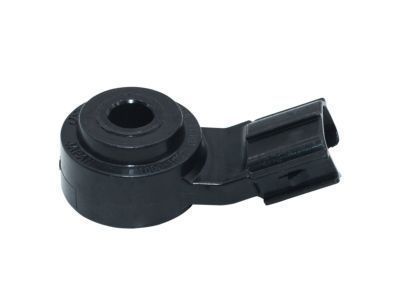
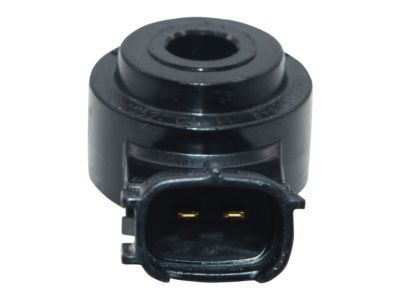
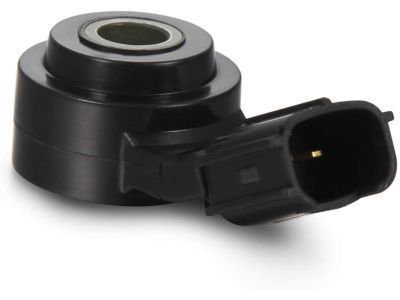
Toyota 89615-20090 Knock Control Sensor

2001-2025 Toyota 8961520090

Customer Questions & Expert Answers (17)
Toyota 89615-20090 Knock Control Sensor
  • Part Description
    Sensor, Knock Control
  • Part Name Code
    89615
  • Replaced By
    89615-06010
  • Manufacturer
    Toyota
Make sure this part fits
$137.45 MSRP: $195.41
You Save: $57.96 (30%)
Ships in 1-3 Business Days
1
ADD TO CART
  • Related Parts
  • Product Specifications
  • Vehicle Fitment
  • Customer Questions & Expert Answers
  • Product Specifications

    BrandGenuine Toyota
    Part Name Code89615
    Manufacturer Part Number89615-20090
    Part DescriptionSensor, Knock Control
    Item Dimensions4.0 x 1.9 x 1.3 inches
    Item Weight0.40 Pounds
    ConditionNew
    Fitment TypeDirect Replacement
    ManufacturerToyota
    SKU89615-20090
    WarrantyThis genuine Toyota part is guaranteed by Toyota's factory warranty.
    Shipping & ReturnShipping Policy Return Policy
    Warning: California’s Proposition 65
  • Vehicle Fitment

    Year Make Model Trim & Engine Important vehicle option details
    2016 Scion iMN|4 Cyl 1.8L2ZRFAE; 2ZRFAE; ZRE186L-AHFNPA, ZRE186L-AHFNPK, ZRE186L-AHXNPA, ZRE186L-AHXNPK
    2012-2015 Scion iQ4 Cyl 1.3L1NRFE; 1NRFE; NGJ10L-BGXNGA
    2005-2016 Scion tCG|4 Cyl 2.4L, 4 Cyl 2.5L2ARFE, 2AZFE; 2ARFE, 2AZFE; AGT20L-ALFGKA, AGT20L-ALFGKK, AGT20L-ALTGKA, AGT20L-ALTGKK, ANT10L-ALMGKA, ANT10L-ALPGKA
    2005-2006 Scion xA4 Cyl 1.5L1NZFE; 1NZFE; NCP61L-HHMNKA, NCP61L-HHPNKA
    2008-2015, 2005-2006 Scion xB4 Cyl 1.5L, 4 Cyl 2.4L1NZFE, 2AZFE; 1NZFE; NCP31L-DHMNKA, 2AZFE; AZE151L-FHMNKA, AZE151L-FHMNKK, AZE151L-FHPNKA, AZE151L-FHPNKK, NCP31L-DHPNKA
    2008-2014 Scion xD4 Cyl 1.8L2ZRFE; 2ZRFE; ZSP110L-AHMRKA, ZSP110L-AHMRKK, ZSP110L-AHPRKA, ZSP110L-AHPRKK
    2003-2024 Toyota 4RunnerLimited, SR5|4 Cyl 2.7L, 6 Cyl 4.0L, 8 Cyl 4.7L1GRFE, 2TRFE, 2UZFE; 1GRFE, 2TRFE, 2UZFE; GRN210L-GKAGKA, GRN210L-GKAZKA, GRN210L-GKPGKA, GRN210L-GKPZKA, GRN215L-GKAGKA, GRN215L-GKAZKA, GRN215L-GKPGKA, GRN215L-GKPZKA, GRN280L-GKAGKA, GRN285L-GKAGKA, TRN280L-GKPGKA, TRN285L-GKPGKA, UZN210L-GKAGKA, UZN210L-GKAZKA, UZN215L-GKAGKA, UZN215L-GKAZKA
    2005-2022 Toyota AvalonLimited, Touring, XL, XLE, XLE Premium, XLE Touring Or Touring, XLS, XSE|4 Cyl 2.5L, 6 Cyl 3.5L2ARFXE, 2GRFE, 2GRFKS, A25AFKS, A25AFXS; 2ARFXE, 2GRFE, 2GRFKS, A25AFKS, A25AFXS; AVX40L-AEXGBA, AVX40L-AEXPBA, AXXA55L-AEZGBA, AXXA55L-AEZPBA, AXXH50L-AEXGBA, AXXH50L-AEXPBA, AXXH50L-AEXQBA, AXXH51L-AEXGBA, AXXH51L-AEXPBA, AXXH51L-AEXQBA, GSX30L-AEAGKA, GSX30L-AEANKA, GSX30L-AEAPKA, GSX30L-AETGKA, GSX30L-AETNKA, GSX30L-AETPKA, GSX40L-AETGKA, GSX40L-AETPKA, GSX40L-AETQKA, GSX50L-AEZGBA, GSX50L-AEZPBA, GSX50L-AEZQBA, GSX50L-AEZSBA
    2017-2022 Toyota C-HR4 Cyl 2.0L3ZRFAE; 3ZRFAE; ZGX10L-AHXDPA, ZGX10L-AHXEPA, ZGX10L-AHXGPA, ZGX10L-AHXNPA, ZGX10L-BHXNPA
    2002-2024 Toyota CamryLE, N, No Grade, SE, XLE, XSE|4 Cyl 2.4L, 4 Cyl 2.5L, 6 Cyl 3.0L, 6 Cyl 3.3L, 6 Cyl 3.5L1MZFE, 2ARFE, 2ARFXE, 2AZFE, 2AZFXE, 2GRFE, 2GRFKS, 3MZFE, A25AFKS, A25AFXS; 1MZFE, 2ARFE, 2ARFXE, 2AZFE, 2AZFXE, 2GRFE, 2GRFKS, 3MZFE, A25AFKS, A25AFXS; ACV30L-AEAGKA, ACV30L-AEANKA, ACV30L-AEASKA, ACV30L-AEMNKA, ACV30L-AEMSKA, ACV30L-AEPGKA, ACV30L-AEPNKA, ACV30L-AEPSKA, ACV30L-CEAGKA, ACV30L-CEANKA, ACV30L-CEASKA, ACV30L-CEPGKA, ACV30L-CEPNKA, ACV30L-CEPSKA, ACV40L-AEAGKA, ACV40L-AEANKA, ACV40L-AEMNKA, ACV40L-CEAGKA, ACV40L-CEANKA, ACV40L-CEASKA, ACV40L-CEMNKA, ACV40L-CEMSKA, AHV40L-AEXGBA, AHV40L-CEXGBA, ASV40L-AETGKA, ASV40L-AETNKA, ASV40L-CEFNKA, ASV40L-CEFSKA, ASV40L-CETGKA, ASV40L-CETNKA, ASV40L-CETSKA, ASV50L-CETEKA, ASV50L-CETGKA, ASV50L-CETNKA, ASV50L-CETPKA, ASV50L-CETSKA, AVV50L-CEXGBA, AVV50L-CEXNBA, AVV50L-CEXSBA, AXVA70L-AEZNBA, AXVA70L-AEZSBA, AXVA70L-CEZEBA, AXVA70L-CEZGBA, AXVA70L-CEZNBA, AXVA70L-CEZPBA, AXVA70L-CEZSBA, AXVA75L-CEZGBA, AXVA75L-CEZNBA, AXVA75L-CEZPBA, AXVA75L-CEZSBA, AXVH70L-CEXGBA, AXVH70L-CEXNBA, AXVH70L-CEXPBA, AXVH70L-CEXSBA, AXVH71L-CEXGBA, AXVH71L-CEXSBA, GSV40L-AETGKA, GSV40L-AETNKA, GSV40L-CETGKA, GSV40L-CETNKA, GSV40L-CETSKA, GSV50L-CETGKA, GSV50L-CETSKA, GSV70L-CEZGBA, GSV70L-CEZPBA, MCV30L-AEAGKA, MCV30L-AEANKA, MCV30L-AEASKA, MCV30L-AEPGKA, MCV30L-AEPNKA, MCV30L-AEPSKA, MCV30L-CEAGKA, MCV30L-CEANKA, MCV30L-CEASKA, MCV30L-CEPGKA, MCV30L-CEPNKA, MCV30L-CEPSKA, MCV31L-AEASKA, MCV31L-CEASKA
    View More
  • Customer Questions & Expert Answers

    Q:
    I just want to confirm I'm purchasing a correct part before placing an order Posted by ToyotaPartsDeal Specialist
    A:
    You can Select Your Vehicle to check if 89615-20090 fits your vehicle.
    Posted by ToyotaPartsDeal Specialist
    Q:
    How do you replace the knock sensor on 2003 through 2009 Toyota 4Runner? Posted by Customer
    A:
    For V6 models, the knock sensors are located on top of the engine block, under the intake manifold, and accessing them is extremely difficult as it requires removing the cylinder heads; therefore, it is advisable to replace both sensors even if only one is defective. Begin by draining the engine coolant, then remove the cylinder heads, followed by the heater coolant inlet hose and the coolant outlet pipe. Disconnect the electrical connectors from the knock sensors, carefully noting their orientation before removing the sensor retaining bolts and the sensors themselves. Proper orientation is critical to avoid clearance issues during the installation of the cylinder heads and intake manifold, so ensure each sensor is positioned exactly as it was before removal, then tighten the retaining bolts to the specified torque. The remainder of the installation follows the reverse order of removal, and finally, refill the engine cooling system. For V8 models, the knock sensors are also located on top of the engine block, under the intake manifold, in front of the starter motor, and for 2003 and later models, the air injection pump must be removed to access them. Start by removing the upper and lower intake manifolds as a single assembly without separating them. Disconnect the knock sensor electrical connector; for 2003 and 2004 models, the sensors are screw-in types, while for 2005 and later models, they are bolted to the engine. Unscrew the knock sensor with a deep socket for the earlier models or remove the retaining bolts for the later models. Installation is the reverse of removal, ensuring to tighten the sensors or retaining bolts to the specified torque. Finally, refill the engine cooling system.
    Posted by ToyotaPartsDeal Specialist
    Q:
    How to replace the knock sensor on 2007 through 2015 Toyota Avalon? Posted by Customer
    A:
    To replace the knock sensor, begin by releasing the pressure from the fuel system and disconnecting the negative battery terminal. For four-cylinder models, remove the intake manifold and disconnect the electrical connector to access the knock sensor. Slide the sensor off the mounting stud, install the new sensor, and tighten the nut to 15 ft-lbs. As for the V6 engine models, remove the lower intake manifold. After that, unplug the knock sensor harness connector. Remove the sensors, clean the mounting surface, and install the new sensors. Tighten the bolts securely. In both cases, reinstall any parts that were removed and refill the cooling system.
    Posted by ToyotaPartsDeal Specialist
    Q:
    How do you replace Knock Sensor on Toyota Corolla? Posted by Customer
    A:
    The knock control system is also intended for leading spark knock during the period of heavy detonation to give the engine optimum spark advance for driveability. The knock sensor senses the vibration in the engine that is due to knock and gives a voltage output proportional to the degree of knock. This voltage signal is felt by the PCM that slows down the ignition timing until the detonation is over. The knock sensor is mounted at the back of the EM, toward the rear of the car, right below the cylinder head. First, to remove the sensor, the cable of the negative terminal of the battery should be disconnected, the cooling system should be emptied and the intake manifold should be unbolted. Then, unscrew the knock sensor that is bolted to the side of the block beneath the intake manifold and unclip the electrical connector. If using the old sensor, was the threads with thread sealant as all new sensors come threaded; do not overdo the sealant else the sensor will not work as required. Securely bolt in the knock sensor, without over tightening, reconnect the electrical connector, replace the cooling system fluids, and confirm that there are no leaks.
    Posted by ToyotaPartsDeal Specialist
    Q:
    How to replace a knock sensor on Toyota Matrix? Posted by Customer
    A:
    The knock control system is designed in order to lessen spark knock during heavy detonation periods. This gives the engineer an opportunity to make use of optimal spark advances for improved driveability. The output voltage produced by the knock sensor increases as the severity of the knock increases. The PCM monitors the voltage signal, retards ignition timing until detonation ceases. On the front side of engine block, below the cylinder head and mounted on a stud bolt is where knock sensor is located. Remove cable from the negative terminal. Cooling system needs to be drained. Intake manifold should be removed. Disconnect electrical connector and remove fastening nut securing knock sensor and then remove sensor itself. Attach a slight angle at bottom with the connector facing downward in right manner in order to reduce water ingress into it. Fix tightly mounting fastener of a detection device capable of capturing various engine knocking sounds. Do not screw up with your equipment lest something happens to it; over-tightening may cause damage however small it might be that you cannot even see without magnifying glass. Plugin electrical connector, refill cooling system, and look for leaks.
    Posted by ToyotaPartsDeal Specialist
    Q:
    How do you replace the Knock Sensor on Toyota Prius? Posted by Customer
    A:
    The knock control system is intentionally planned to reduce spark knock during heavy detonating occasions which in turn enables the petrol engine to harness the finest spark advance with the intention of enhancing the driveability of the vehicle. Knock sensor measures vibration in the engine that is beyond normal and generates voltage signal that rise with increasing levels of knock. This voltage signal is observed by ECM which in turn blocks the ignition advance till the detonation is over. Knock sensor is mounted on the front of the engine block just below the cylinder head and oriented towards the forward part of the engine compartment, if viewed from the vehicle rear end side. The knock sensor is located above the oil pressure sensor and behind the intake manifold, to replace the knock sensor remove the intake manifold, disconnect the electrical connector and take out the sensor. Should one use the old sensor, the thread should be coated with thread sealant; in case the newly bought sensor, the coatings are probably pre-applied, do not apply another coating as it may hinder its functioning. Screw the knock sensor to the block until it is seize, then torque it up to 15 ft/lbs; do not over torque it since it can crack. The rest of the installation goes in the opposite sequence to the removal of these parts; then replenishes the cooling system and look for any signs of leakage.
    Posted by ToyotaPartsDeal Specialist
    Q:
    How to replace knock sensors on Toyota Sequoia? Posted by Customer
    A:
    The knock sensors on V6 models are located under the intake manifold, making them difficult to access. It is recommended to replace both sensors even if only one is defective. The process involves draining the coolant, removing the cylinder heads, disconnecting the electrical connectors, and carefully noting the sensor orientation. When installing the sensors, it is crucial to position them exactly as before. For VB models, the process varies depending on the engine type. For 2UZ-FE engines, the air injection pump needs to be removed, while for 1UR-FE, 3UR-FE, and 3UR-FBE VB engines, there are four sensors. The steps involve removing the intake manifold, disconnecting the electrical connector, removing the retaining bolts, and then installing the sensors in reverse order. The engine cooling system also needs to be refilled.
    Posted by ToyotaPartsDeal Specialist
    Q:
    What is the role of the knock sensor in the ignition system on Toyota Yaris? Posted by Customer
    A:
    Several fuel-related sensors can affect the ignition system, with the issues likely being the crankshaft position sensor, camshaft position sensor, and knock sensor. The knock sensor detects pinking, a phenomenon that occurs when the engine runs on low-quality or low-octane fuel. It identifies vibrations caused by pinking and alerts the ECU to delay ignition timing until it stops. The knock sensor can be removed by taking off the throttle body and inlet manifold. Then, disconnect the wiring plug, and unscrew it from the engine. Proper torque is crucial when refitting the sensor for optimal functionality.
    Posted by ToyotaPartsDeal Specialist
    Q:
    What is the first step to take when working on the knock sensor for the 2003 Toyota Avalon? Posted by Customer
    A:
    The first step is to disconnect the cable from the negative terminal of the battery. If you're working on a V6 engine, you should also drain the cooling system.
    Posted by ToyotaPartsDeal Specialist
    Q:
    How do you replace the knock sensor in a 2007 Toyota Camry four-cylinder model? Posted by Customer
    A:
    To replace the knock sensor in four-cylinder models, you need to remove the intake manifold and disconnect the electrical connector to access the knock sensor. Then, slide the sensor off the mounting stud, install the new sensor, and tighten the nut to 15 ft-lbs.
    Posted by ToyotaPartsDeal Specialist
    See expert answers on similar Knock Sensor
    Q:
    What should be ensured during the installation of knock sensors in the 2008 Toyota Highlander? Posted by Customer
    A:
    When installing knock sensors on 2004 and later models, angle the electrical terminals slightly below the horizontal. Follow the reverse procedure for reassembly and ensure secure tightening of the knock sensors or retaining nuts.
    Posted by ToyotaPartsDeal Specialist
    See expert answers on similar Knock Sensor
    Q:
    What are the steps for testing the knock sensor for the 2017 Toyota RAV4? Posted by Customer
    A:
    8. Disconnect the knock sensor connector. 9. Using a Digital Volt Ohm Meter (DVOM) set to measure resistance, measure between the two terminals of the knock sensor. With the engine cold (68 degrees-F), resistance should be 120k to 280k ohms.
    Posted by ToyotaPartsDeal Specialist
    See expert answers on similar Knock Sensor
    Q:
    How should the knock sensor be installed for the 2007 Toyota Sienna? Posted by Customer
    A:
    Install the knock sensor and tighten it securely to approximately 30 ft-lbs, being careful not to over-tighten to avoid damage.
    Posted by ToyotaPartsDeal Specialist
    See expert answers on similar Knock Sensor
    Q:
    What should you do if you're working on the 2004 Toyota Solara before removing the intake manifold? Posted by Customer
    A:
    If you're working on a four-cylinder engine, you should pinch off the coolant hoses to the throttle body before removing the intake manifold/throttle body.
    Posted by ToyotaPartsDeal Specialist
    Q:
    What should be done after removing the intake manifold for the 2006 Toyota Tacoma? Posted by Customer
    A:
    After removing the intake manifold, disconnect the knock sensor electrical connector.
    Posted by ToyotaPartsDeal Specialist
    Q:
    Where are the knock sensors located on the 2018 Toyota Tundra? Posted by Customer
    A:
    On VB models, the knock sensors are also located under the intake manifold.
    Posted by ToyotaPartsDeal Specialist
    See expert answers on similar Knock Sensor
    Q:
    is this knock sensor a matsushita or denso please let me know as soon as possible so I can put my order in Posted by Customer: 2008 Toyota Tacoma
    A:
    part# 89615-20090 was superseded by part# 89615-06010, yes this fits your vehicle
    Posted by ToyotaPartsDeal Specialist 16/8/2018
    If you have any questions about this product, please don't hesitate to ask us. We will be happy to help you!

Genuine Toyota Part 89615-20090, the Right Choice

To ensure reliability, purchase Toyota part # 89615-20090 Knock Control Sensor. It is sometimes referred to as Toyota Knock Sensor. For unrivaled quality, OEM parts are the ultimate choice. These parts are manufactured by Toyota's official factory using top-quality materials and undergo strict testing procedures, ensuring outstanding dependability and long-lasting durability. This part fits 2003-2024 Toyota 4Runner, 2002-2024 Toyota Camry, 2003-2023 Toyota Highlander, 2005-2023 Toyota Tacoma.

ToyotaPartsDeal.com is a leading supplier of genuine Toyota parts and accessories such as Toyota 8961520090 Knock Control Sensor. In need of OEM Toyota parts? Look no further than our extensive inventory of genuine Toyota parts, competitively priced to be highly exceptional in the market. They are all manufacturer-warrantied. Add to that, our easy return policy and swift delivery service, and your shopping experience promises to be the great pleasant ever. For detailed Toyota parts information, click here.

Why choose Toyota Parts Deal

  • Dedicated Service

    Your complete satisfaction is our #1 goal

  • Lowest Prices

    Best deals on genuine OE parts from dealerships

  • Fast Delivery

    Orders are processed and delivered promptly