Make sure this part fits

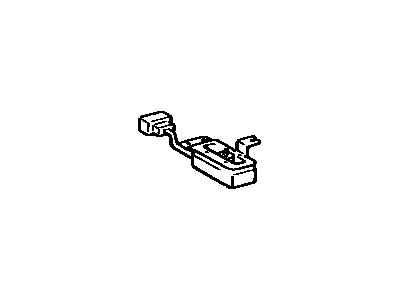
Toyota 87290-14010 Switch Assembly, Heater

1986-1992 Toyota Supra 8729014010

Customer Questions & Expert Answers (2)
Toyota 87290-14010 Switch Assembly, Heater
  • Part Description
    Switch Assy, Heater
  • Part Name Code
    87290A
  • Manufacturer
    Toyota
  • Manufacturer's Notes
    This part is discontinued.
Make sure this part fits
  • Related Parts
  • Product Specifications
  • Vehicle Fitment
  • Customer Questions & Expert Answers
  • Product Specifications

    BrandGenuine Toyota
    Part Name Code87290A
    Manufacturer Part Number87290-14010
    Part DescriptionSwitch Assy, Heater
    Other NamesBlower Motor Switch
    Item Dimensions4.2 x 3.4 x 1.9 inches
    Item Weight0.60 Pounds
    ConditionNew
    Fitment TypeDirect Replacement
    ManufacturerToyota
    SKU87290-14010
    WarrantyThis genuine Toyota part is guaranteed by Toyota's factory warranty.
    Shipping & ReturnShipping Policy Return Policy
    Warning: California’s Proposition 65
  • Vehicle Fitment

    Year Make Model Trim & Engine Important vehicle option details
    1986-1992 Toyota Supra6 Cyl 3.0L7MGE, 7MGTE; 7MGE, 7MGTE; MA70L-BJMVFA, MA70L-BJMVFK, MA70L-BJMVZA, MA70L-BJMVZK, MA70L-BJPVFA, MA70L-BJPVFK, MA70L-BJPVZA, MA70L-BJPVZK, MA70L-BLMVFA, MA70L-BLMVFK, MA70L-BLMVZA, MA70L-BLMVZK, MA70L-BLPVFA, MA70L-BLPVFK, MA70L-BLPVZA, MA70L-BLPVZK
  • Customer Questions & Expert Answers

    Q:
    I just want to confirm I'm purchasing a correct part before placing an order Posted by ToyotaPartsDeal Specialist
    A:
    You can Select Your Vehicle to check if 87290-14010 fits your vehicle.
    Posted by ToyotaPartsDeal Specialist
    Q:
    How to remove and reinstall the heater control assembly in Toyota Supra? Posted by Customer
    A:
    For 1979 through 1981 models, begin by disconnecting the negative battery cable and taking precautions if your vehicle's stereo has an anti-theft system. Remove the dashboard under tray by unscrewing three screws and taking it out. Next, unscrew and remove the lid from the glove compartment, pull off the heater control knobs, and gently pry off the control panel using a screwdriver. Remove the fuse box cover and the knobs from the radio, along with six screws from the instrument panel, and carefully pull the panel out from the bottom. Disconnect and remove the instrument cluster and clock, followed by removing the radio by disconnecting aerial and speaker wires and four mounting screws. Remove the air ducts from the heater assembly, disconnect the four heater control cables, and disconnect the heater blower switch/wires. Undo four screws to withdraw the A/C Switch. For dismantling the control panel, remove clips from outer cables and unhook inner ones, and the blower switch can be removed after unscrewing it. Reinstallation is the reverse of removal, with particular attention to adjusting the control cables, which operate different components of the heater system based on their lengths.For 1982 through 1986 models, start by disconnecting the negative battery cable, taking precautions for anti-theft systems in your stereo. Remove control knobs, unscrew three panel securing screws, and withdraw the panel. Remove the upper console panel and forward console, as well as the ashtray and lower retaining screws. Undo upper retaining screws, disconnect lighter and ashtray light connectors, and remove the panel. Unclip and detach the gear lever boot for the console. Remove retaining screws on each side at the front and rear, pull the console forward, and disconnect electrical connections. Remove a metal side pillar support bracket by removing the screw and bolts. Lower the control unit, disconnect the electrical connector and control cables, and remove the A/C Switch. Reinstallation is the reverse of removal.For 1987 and later models, disconnect the negative battery cable and consider anti-theft system precautions for the stereo. Remove the ashtray and detach the ashtray retainer by removing two screws (for models with a manual transmission, remove the shift lever knob). Remove three screws attaching the instrument cluster finish panel to the console. Remove three screws holding the A/C Switch to the dash, pull out the control assembly, unplug all electrical connectors, and remove it. Reinstallation is the reverse of removal.
    Posted by ToyotaPartsDeal Specialist
    If you have any questions about this product, please don't hesitate to ask us. We will be happy to help you!

Genuine Toyota Part 87290-14010, the Right Choice

To ensure reliability, purchase Toyota part # 87290-14010 Switch Assembly, Heater. It is sometimes referred to as Toyota A/C Switch, Toyota Blower Control Switches. For unrivaled quality, OEM parts are the ultimate choice. These parts are manufactured by Toyota's official factory using top-quality materials and undergo strict testing procedures, ensuring outstanding dependability and long-lasting durability. This part fits 1986-1992 Toyota Supra.

ToyotaPartsDeal.com is a leading supplier of genuine Toyota parts and accessories such as Toyota 8729014010 Switch Assembly, Heater. In need of OEM Toyota parts? Look no further than our extensive inventory of genuine Toyota parts, competitively priced to be highly exceptional in the market. They are all manufacturer-warrantied. Add to that, our easy return policy and swift delivery service, and your shopping experience promises to be the great pleasant ever. For detailed Toyota parts information, click here.

Why choose Toyota Parts Deal

  • Dedicated Service

    Your complete satisfaction is our #1 goal

  • Lowest Prices

    Best deals on genuine OE parts from dealerships

  • Fast Delivery

    Orders are processed and delivered promptly