×
- Live Chat
- 1-888-905-9199


My Garage
My Account
Cart
Genuine Toyota Solara Steering Wheel
Navigation Steering Wheel- Select Vehicle by Model
- Select Vehicle by VIN
Select Vehicle by Model
orMake
Model
Year
Select Vehicle by VIN
For the most accurate results, select vehicle by your VIN (Vehicle Identification Number).
47 Steering Wheels found
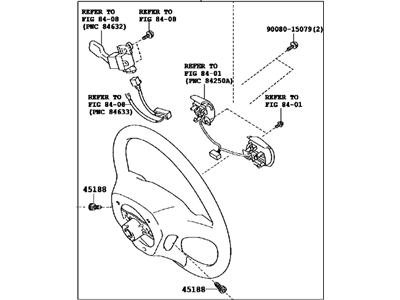
Toyota Solara Wheel Assembly, Steering
Part Number: 45100-06K90-A0$875.54 MSRP: $1288.79You Save: $413.25 (33%)Ships in 1-3 Business DaysToyota Solara Wheel Assembly, Steering
Part Number: 45100-06141-B1$301.37 MSRP: $432.13You Save: $130.76 (31%)Ships in 1-3 Business DaysToyota Solara Wheel Assembly, Steering
Part Number: 45100-06821-A0$858.30 MSRP: $1263.42You Save: $405.12 (33%)Ships in 1-3 Business DaysToyota Solara Wheel Assembly, Steering
Part Number: 45100-06800-B0$858.12 MSRP: $1263.16You Save: $405.04 (33%)Ships in 1-3 Business DaysToyota Solara Wheel Assembly, Steering
Part Number: 45100-06460-B1$405.14 MSRP: $596.37You Save: $191.23 (33%)Ships in 1-3 Business DaysToyota Solara Wheel Assembly, Steering
Part Number: 45100-06K50-A0$460.60 MSRP: $678.00You Save: $217.40 (33%)Ships in 1-3 Business DaysToyota Solara Wheel Assembly, Steering
Part Number: 45100-06K40-A0$460.81 MSRP: $678.31You Save: $217.50 (33%)Ships in 1-3 Business DaysToyota Solara Wheel Assembly, Steering
Part Number: 45100-06K40-B0$460.81 MSRP: $678.31You Save: $217.50 (33%)Ships in 1-3 Business DaysToyota Solara Wheel Assembly, Steering
Part Number: 45100-06K50-B0$460.81 MSRP: $678.31You Save: $217.50 (33%)Ships in 1-3 Business DaysToyota Solara Wheel Assembly, Steering
Part Number: 45100-06K60-B0$731.37 MSRP: $1076.57You Save: $345.20 (33%)Ships in 1-3 Business DaysToyota Solara Wheel Assembly, Steering
Part Number: 45100-06470-B1$767.09 MSRP: $1129.15You Save: $362.06 (33%)Ships in 1-3 Business DaysToyota Solara Wheel Assembly, Steering
Part Number: 45100-06470-A1$781.04 MSRP: $1149.69You Save: $368.65 (33%)Ships in 1-3 Business DaysToyota Solara Wheel Assembly, Steering
Part Number: 45100-06790-A0$816.79 MSRP: $1202.30You Save: $385.51 (33%)Ships in 1-3 Business DaysToyota Solara Wheel Assembly, Steering
Part Number: 45100-06790-B0$816.79 MSRP: $1202.30You Save: $385.51 (33%)Ships in 1-3 Business DaysToyota Solara Wheel Assembly, Steering
Part Number: 45100-06791-A0$816.79 MSRP: $1202.30You Save: $385.51 (33%)Ships in 1-3 Business DaysToyota Solara Wheel Assembly, Steering
Part Number: 45100-06791-B0$816.79 MSRP: $1202.30You Save: $385.51 (33%)Ships in 1-3 Business DaysToyota Solara Wheel Assembly, Steering
Part Number: 45100-06800-A0$816.79 MSRP: $1202.30You Save: $385.51 (33%)Ships in 1-3 Business DaysToyota Solara Wheel Assembly, Steering
Part Number: 45100-06801-A0$816.79 MSRP: $1202.30You Save: $385.51 (33%)Ships in 1-3 Business DaysToyota Solara Wheel Assembly, Steering
Part Number: 45100-06801-B0$816.79 MSRP: $1202.30You Save: $385.51 (33%)Ships in 1-3 Business DaysToyota Solara Wheel Assembly, Steering
Part Number: 45100-06810-A0$816.79 MSRP: $1202.30You Save: $385.51 (33%)Ships in 1-3 Business Days
| Page 1 of 3 |Next >
1-20 of 47 Results
Toyota Solara Steering Wheel
If you are in demand for superior quality and affordable OEM Toyota Solara Steering Wheel, then shop with us! We own a wide range of the reduced-priced genuine Toyota Solara Steering Wheel. You can purchase in confidence as all parts come with a manufacturer's warranty. Any issues with our products? No need to worry as we have a hassle-free return policy to guide you every step of the way.
Toyota Solara Steering Wheel Parts Questions & Experts Answers
- Q: How do you perform the removal and installation of the steering wheel on 2002 through 2008 Toyota Solara?A: To disconnect the steering wheel following these procedures; switch off the ignition and disconnect the cable from the negative terminal of the car battery. Third, align the wheel with the dash and release the steering wheel covers on both sides, unscrew the Tone screws securing the airbag module to the steering wheel but don't remove them, just until their circle groove fits into the screw case. Remove the air bag module and unbolt the connectors from the air bag module noting that the black connector pin is the ground. Disconnect the electrical connector of the horn and cruise control system, and then undo the nut of the steering wheel and align the position of the shaft with the hub by making a mark for easy location next time. With a Puller, remove the steering wheel from the shaft but without hammering the shaft. If needed, the spiral cable should be deconnected, which requires the removal of the steering column covers, pulling the electrical connector, and releasing the three claws. Regarding installation procedure, make sure to have the front wheels of the 3D printer in the straight position, and then it is important to rotate the spiral cable anti-clockwise until the time comes when it does not feel easy to turn anymore, once attained, rotate it clockwise by approximately 2.5 turns making sure that the two pointers are lined. Place the mark on the hub of the steering wheel toward the mark of the shaft, and then put the wheel on the shaft, after screwed the nut to the appropriate degree of twist. Insert the horn and cruising control connector and the electrical connectors of the airbag module and tight the locks of the connectors. Last step is to connect the air bag module and torque the Torx retaining screws in the prescribed measure and reconnect the negative terminal of the battery.


