Make sure this part fits

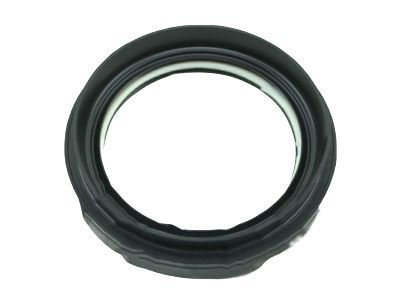
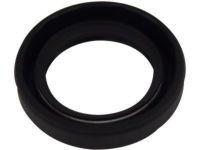
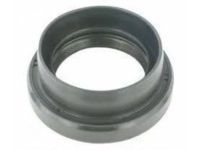
Toyota 90311-50045 Seal, Type T Oil

2011-2020 Toyota 9031150045

Customer Questions & Expert Answers (8)
Toyota 90311-50045 Seal, Type T Oil
  • Part Description
    Oil Seal, Front Drive Shaft, LH
  • Comment
    (FOR HYBRID VEHICLE TRANSAXLE ASSY)
  • Position
    Driver Side
  • Replaced By
    90311-50064
  • Manufacturer
    Toyota
Make sure this part fits
$14.58 MSRP: $20.37
You Save: $5.79 (29%)
Ships in 1-2 Business Days
1
ADD TO CART
  • Related Parts
  • Product Specifications
  • Vehicle Fitment
  • Customer Questions & Expert Answers
  • Product Specifications

    BrandGenuine Toyota
    Manufacturer Part Number90311-50045
    Part DescriptionOil Seal, Front Drive Shaft, LH
    Other NamesAxle Seal
    Item Dimensions1.9 x 1.8 x 0.2 inches
    Item Weight0.20 Pounds
    PositionDriver Side
    ConditionNew
    Fitment TypeDirect Replacement
    ManufacturerToyota
    SKU90311-50045
    WarrantyThis genuine Toyota part is guaranteed by Toyota's factory warranty.
    Shipping & ReturnShipping Policy Return Policy
    Warning: California’s Proposition 65
  • Vehicle Fitment

    Year Make Model Trim & Engine Important vehicle option details
    2011-2016 Scion tC4 Cyl 2.5L2ARFE; 2ARFE; AGT20L-ALTGKA, AGT20L-ALTGKK
    2011-2014 Scion xB4 Cyl 2.4L2AZFE; 2AZFE; AZE151L-FHPNKA, AZE151L-FHPNKK
    2011-2018 Toyota AvalonLimited, XLE Premium, XLE Touring Or Touring, XLS|6 Cyl 3.5L2GRFE; 2GRFE; GSX30L-AETGKA, GSX30L-AETPKA, GSX40L-AETGKA, GSX40L-AETPKA, GSX40L-AETQKA
    2011-2017 Toyota CamryLE, N, SE, XLE, XSE|4 Cyl 2.5L, 6 Cyl 3.5L2ARFE, 2GRFE; 2ARFE, 2GRFE; ASV40L-CETGKA, ASV40L-CETNKA, ASV40L-CETSKA, ASV50L-CETEKA, ASV50L-CETGKA, ASV50L-CETNKA, ASV50L-CETPKA, ASV50L-CETSKA, GSV40L-CETGKA, GSV40L-CETNKA, GSV40L-CETSKA, GSV50L-CETGKA, GSV50L-CETSKA
    2020, 2011-2013 Toyota CorollaXRS|4 Cyl 1.8L, 4 Cyl 2.4L2AZFE, 2ZRFXE; 2AZFE; AZE141L-DEASKA, 2ZRFXE; ZWE211L-AEXLBA, AZE141L-DEASKK, ZWE211L-AEXLBK
    2011-2019 Toyota HighlanderSTD|4 Cyl 2.7L, 6 Cyl 3.5L1ARFE, 2GRFE; 1ARFE, 2GRFE; ASU40L-ARTNKA, ASU50L-ARTNKA, GSU50L-ARTGKA, GSU50L-ARTMKA, GSU50L-ARTNKA, GSU55L-ARTGKA, GSU55L-ARTMKA, GSU55L-ARTNKA
    2011-2014 Toyota Matrix4 Cyl 2.4L2AZFE; 2AZFE; AZE141L-DHANKA, AZE146L-DHASKA, AZE146L-DHASKK
    2011-2020 Toyota PriusG, L, S|4 Cyl 1.8L2ZRFXE; 2ZRFXE; ZVW30L-AHXBBA, ZVW30L-AHXEBA, ZVW30L-AHXEBK, ZVW30L-AHXGBA, ZVW35L-BHXBBA, ZVW35L-BHXEBA, ZVW35L-BHXEBK, ZVW35L-BHXGBA, ZVW50L-AHXEBA, ZVW51L-AHXBBA, ZVW51L-AHXEBA, ZVW51L-AHXGBA, ZVW51L-AHXHBA, ZVW55L-AHXEBA, ZVW55L-AHXGBA
    2017-2020 Toyota Prius Prime4 Cyl 1.8L2ZRFXE; 2ZRFXE; ZVW52L-AHXEBA, ZVW52L-AHXGBA
    2012-2017 Toyota Prius V4 Cyl 1.8L2ZRFXE; 2ZRFXE; ZVW41L-AXXEBA, ZVW41L-AXXEBK
    View More
  • Customer Questions & Expert Answers

    Q:
    I would like to know availability and if it is direct fit replacement Posted by ToyotaPartsDeal Specialist
    A:
    You can Select Your Vehicle to check if 90311-50045 fits your vehicle.
    Posted by ToyotaPartsDeal Specialist
    Q:
    How do you remove and install a pinion oil seal on Toyota Rav4? Posted by Customer
    A:
    To remove the pinion oil seal, first raise the rear of the vehicle and support it securely on jackstands, blocking the front wheels to prevent rolling, and place the transmission in Neutral with the parking brake off. Mark the relationship of the driveshaft to the pinion flange or coupling, then unbolt the driveshaft from the flange and suspend it with a piece of wire. Drain the differential oil, then remove the electromagnetic coupling mounting fasteners, tapping the coupling cover with a plastic hammer to detach it from the differential. Use expanding snap ring pliers to remove the linear solenoid retaining snap-ring from the differential case, then take out the 4WD linear solenoid and discard the O-ring. Remove the yoke mounting fasteners and the yoke from the differential, followed by the coupling conical spring washer and shim, noting the direction of the washer. Carefully pry out the diaphragm oil seal without scratching the seal bore. For installation, lubricate the lips of the new seal and fill the space between the seal lips with wheel bearing grease, then install the new seal to a depth of 0.263 to 0.303 in (6.7 to 7.7 mm) using a seal installer or large socket. Reinstall the coupling shim and conical spring washer, followed by the yoke mounting fasteners, tightening them securely. Install a new O-ring onto the solenoid, then reinstall the solenoid and snap-ring, completing the process by checking the differential lubricant level and adding as necessary. For driveaxle oil seals, raise the rear of the vehicle and support it securely on jackstands, blocking the front wheels and placing the transmission in Neutral. Remove the rear driveaxle(s), then carefully pry out the side gear shaft oil seal without scratching the seal bore. Install a new seal to a depth of 0.263 to 0.303 in (6.7 to 7.7 mm) using a seal installer or large socket, lubricate the lip of the new seal with multi-purpose grease, and reinstall the driveaxle(s) while being careful not to damage the seal lip. Finally, check the differential lubricant level and add as necessary.
    Posted by ToyotaPartsDeal Specialist
    Q:
    How can fluid leaks from driveaxle oil seals be repaired on Toyota Prius? Posted by Customer
    A:
    Greasiness is very common particularly because of the deteriorating of the wheel seals, replacing the seals is fairly easy since most of the repairs can be made without the removal of the transaxle from the vehicle. The wheel seals are on each side of the transaxle at which the drive axle inner CV joint is jiggle into the differential. If one has a feeling that leakage is at the seal part of the car, lift the car and place it on the jackstands; if the seal is leaking, fluid will be seen dripping at the side of the transaxle. Take out the driveaxle, subsequently, utilising a screwdriver or prybar free the wheel seal from the transaxle bore damaging the seal bore surface. If the wheel seal can still not be expelled using these tools, a particular wheel seal expulsion tool which can be gotten from auto tool shops will be needed. In removing the new wheel seal, use the corresponding remover or you can use vise grip or big deep socket as drift seeing to it that the seal is installed squarely and firmly into the bore, and before tightening apply multi-purpose grease on the lip of the new seal. Last of all, fit the drive axle as demonstrated in the figure above but ensure that the lip of the new seal is not infringed.
    Posted by ToyotaPartsDeal Specialist
    Q:
    How can you determine if the speed sensor O-ring is leaking for the 2007 Toyota Camry? Posted by Customer
    A:
    For speed sensors on 5-speed transaxles, you can look for lubricant around the sensor housings to determine if an O-ring is leaking.
    Posted by ToyotaPartsDeal Specialist
    See expert answers on similar Wheel Seal
    Q:
    How can you determine if the speed sensor O-ring is leaking for the 2010 Toyota Avalon? Posted by Customer
    A:
    For speed sensors on 5-speed transaxles, you can look for lubricant around the sensor housings to determine if an O-ring is leaking.
    Posted by ToyotaPartsDeal Specialist
    See expert answers on similar Wheel Seal
    Q:
    How can you locate the driveaxle oil seals in a 2013 Toyota RAV4? Posted by Customer
    A:
    To locate the driveaxle oil seals, look for them on the sides of the transaxle where the inner ends of the driveaxles are splined into the differential side gears.
    Posted by ToyotaPartsDeal Specialist
    See expert answers on similar Wheel Seal
    Q:
    What is the first step in replacing the driveaxle oil seal for the 2018 Toyota Highlander? Posted by Customer
    A:
    Remove the driveaxle. If you're replacing the right side driveaxle seal, remove the intermediate shaft and the driveaxle assembly as a single unit.
    Posted by ToyotaPartsDeal Specialist
    See expert answers on similar Wheel Seal
    Q:
    How do you install the new seal properly for the 2019 Toyota Highlander? Posted by Customer
    A:
    Lubricate the new seal's lips, fill the space between the seal lips with wheel bearing grease, and then tap it into position, ensuring it's squared.
    Posted by ToyotaPartsDeal Specialist
    See expert answers on similar Differential Seal
    If you have any questions about this product, please don't hesitate to ask us. We will be happy to help you!

Genuine Toyota Part 90311-50045, the Right Choice

To ensure reliability, purchase Toyota part # 90311-50045 Seal, Type T Oil. It is sometimes referred to as Toyota Transfer Case Seal, Toyota Wheel Seal, Toyota Differential Seal. For unrivaled quality, OEM parts are the ultimate choice. These parts are manufactured by Toyota's official factory using top-quality materials and undergo strict testing procedures, ensuring outstanding dependability and long-lasting durability. This part fits 2011-2018 Toyota Avalon, 2011-2017 Toyota Camry, 2011-2019 Toyota Highlander, 2011-2016 Toyota Sienna.

ToyotaPartsDeal.com is a leading supplier of genuine Toyota parts and accessories such as Toyota 9031150045 Seal, Type T Oil. In need of OEM Toyota parts? Look no further than our extensive inventory of genuine Toyota parts, competitively priced to be highly exceptional in the market. They are all manufacturer-warrantied. Add to that, our easy return policy and swift delivery service, and your shopping experience promises to be the great pleasant ever. For detailed Toyota parts information, click here.

Why choose Toyota Parts Deal

  • Dedicated Service

    Your complete satisfaction is our #1 goal

  • Lowest Prices

    Best deals on genuine OE parts from dealerships

  • Fast Delivery

    Orders are processed and delivered promptly