Make sure this part fits

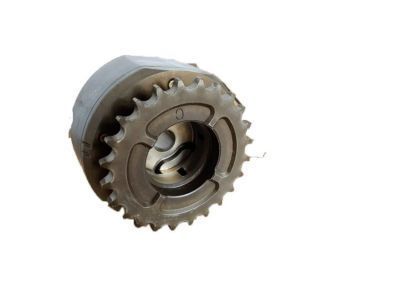
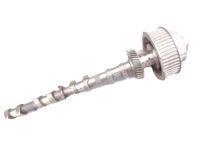
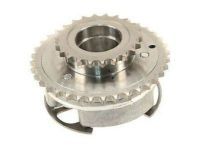
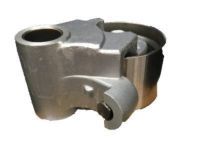
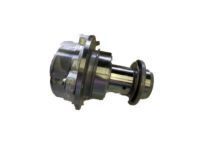
Toyota 13080-31030 Gear Assy, Camshaft Timing Exhaust, LH

2005-2009 Toyota 1308031030

Customer Questions & Expert Answers (18)
Toyota 13080-31030 Gear Assy, Camshaft Timing Exhaust, LH
  • Part Description
    Gear Assy, Camshaft Timing Exhaust, LH
  • Part Name Code
    13080
  • Position
    Driver Side
  • Replaces
    13080-31020
  • Manufacturer
    Toyota
Make sure this part fits
$316.55 MSRP: $453.91
You Save: $137.36 (31%)
Ships in 1-3 Business Days
1
ADD TO CART
  • Related Parts
  • Product Specifications
  • Vehicle Fitment
  • Customer Questions & Expert Answers
  • Product Specifications

    BrandGenuine Toyota
    Part Name Code13080
    Manufacturer Part Number13080-31030
    Part DescriptionGear Assy, Camshaft Timing Exhaust, LH
    Other NamesActuator, Camshaft Gear, Timing Gear Set
    Item Dimensions5.4 x 4.3 x 1.6 inches
    Item Weight2.90 Pounds
    PositionDriver Side
    ConditionNew
    Fitment TypeDirect Replacement
    Replaces13080-31020
    Require Quantity2
    ManufacturerToyota
    SKU13080-31030
    WarrantyThis genuine Toyota part is guaranteed by Toyota's factory warranty.
    Shipping & ReturnShipping Policy Return Policy
    Warning: California’s Proposition 65
  • Vehicle Fitment

    Year Make Model Trim & Engine Important vehicle option details
    2005-2008 Toyota AvalonLimited, XL, XLS|6 Cyl 3.5L2GRFE; 2GRFE; GSX30L-AEAGKA, GSX30L-AEANKA, GSX30L-AEAPKA, GSX30L-AETGKA, GSX30L-AETNKA, GSX30L-AETPKA
    2007-2009 Toyota CamryLE, XLE|4 Cyl 2.4L, 4 Cyl 2.5L, 6 Cyl 3.5L2ARFE, 2AZFE, 2GRFE; 2ARFE, 2AZFE, 2GRFE; ACV40L-AEAGKA, ACV40L-AEANKA, ACV40L-AEMNKA, ASV40L-AETGKA, ASV40L-AETNKA, GSV40L-AETGKA, GSV40L-AETNKA
    2008-2009 Toyota HighlanderGrande, Limited, Sport, STD|4 Cyl 2.7L, 6 Cyl 3.3L, 6 Cyl 3.5L1ARFE, 2GRFE, 3MZFE; 1ARFE, 2GRFE, 3MZFE; ASU40L-BRTNKA, GSU40L-BRAGKA, GSU40L-BRAMKA, GSU40L-BRANKA, GSU40L-BRASKA, GSU45L-BRAGKA, GSU45L-BRAMKA, GSU45L-BRANKA, GSU45L-BRASKA, MHU48L-BRXMKA, MHU48L-BRXNKA
    2008-2009 Toyota Land Cruiser8 Cyl 5.7L3URFE; 3URFE; URJ200L-GNTEKA
    2006-2009 Toyota RAV4Limited, Sport, X|4 Cyl 2.4L, 4 Cyl 2.5L, 6 Cyl 3.5L2ARFE, 2AZFE, 2GRFE; 2ARFE, 2AZFE, 2GRFE; ACA33L-ANPGKA, ACA33L-ANPGKK, ACA33L-ANPSKA, ACA33L-ANPSKK, ACA33L-ANPXKA, ACA33L-ANPXKK, ACA38L-ANPGKA, ACA38L-ANPSKA, ACA38L-ANPXKA, ASA33L-ANPGKA, ASA33L-ANPGKK, ASA33L-ANPSKA, ASA33L-ANPSKK, ASA33L-ANPXKA, ASA33L-ANPXKK, ASA38L-ANPGKA, ASA38L-ANPSKA, ASA38L-ANPXKA, GSA33L-ANAGKA, GSA33L-ANAGKK, GSA33L-ANASKA, GSA33L-ANASKK, GSA33L-ANAXKA, GSA33L-ANAXKK, GSA38L-ANAGKA, GSA38L-ANASKA, GSA38L-ANAXKA
    2008-2009 Toyota SequoiaLimited, Platinum, SR5|8 Cyl 4.6L, 8 Cyl 4.7L, 8 Cyl 5.7L1URFE, 2UZFE, 3URFBE, 3URFE; 1URFE, 2UZFE, 3URFBE, 3URFE; UCK60L-GKALKA, UCK60L-GKASKA, UCK65L-GKALKA, UCK65L-GKASKA, UPK60L-GKTLKA, UPK60L-GKTSKA, UPK65L-GKTLKA, UPK65L-GKTSKA, USK60L-GKTLKA, USK60L-GKTSKA, USK60L-GKTZKA, USK65L-GKTLGA, USK65L-GKTLKA, USK65L-GKTSGA, USK65L-GKTSKA, USK65L-GKTZGA, USK65L-GKTZKA
    2006-2009 Toyota SiennaCE, LE, XLE|6 Cyl 3.3L, 6 Cyl 3.5L2GRFE, 3MZFE; 2GRFE, 3MZFE; GSL20L-PFADKK, GSL20L-PFAEKA, GSL20L-PFAEKK, GSL20L-PFAQKA, GSL20L-PFAQKK, GSL20L-PRADKK, GSL20L-PRAEKA, GSL20L-PRAEKK, GSL20L-PRAQKA, GSL20L-PRAQKK, GSL23L-SBADKA, GSL23L-SBADKK, GSL25L-PFADKK, GSL25L-PFAEKA, GSL25L-PFAEKK, GSL25L-PFAQKA, GSL25L-PFAQKK, MCL20L-PFADKK, MCL20L-PFAEKA, MCL20L-PFAEKK, MCL20L-PFAQKA, MCL20L-PFAQKK, MCL20L-PRADKK, MCL20L-PRAEKA, MCL20L-PRAEKK, MCL20L-PRAQKA, MCL20L-PRAQKK, MCL23L-SBADKA, MCL23L-SBADKK, MCL25L-PFADKK, MCL25L-PFAEKA, MCL25L-PFAEKK, MCL25L-PFAQKA, MCL25L-PFAQKK
    2007-2009 Toyota TundraLimited, SR5|6 Cyl 4.0L, 8 Cyl 4.6L, 8 Cyl 4.7L, 8 Cyl 5.7L1GRFE, 1URFE, 2UZFE, 3URFBE, 3URFE; 1GRFE, 1URFE, 2UZFE, 3URFBE, 3URFE; GSK50L-TRADKA, GSK51L-CRASKA, GSK51L-THADKA, UCK50L-TRADKA, UCK51L-CRALKA, UCK51L-CRASKA, UCK51L-PSALKA, UCK51L-PSASKA, UCK51L-THADKA, UCK52L-CHASKA, UCK55L-TRADKA, UCK56L-CRALKA, UCK56L-CRASKA, UCK56L-PSALKA, UCK56L-PSASKA, UCK56L-THADKA, UCK57L-CHASKA, UPK50L-TRTDKA, UPK51L-CRTLKA, UPK51L-CRTSKA, UPK51L-PSTLKA, UPK51L-PSTSKA, UPK51L-THTDKA, UPK52L-CHTSKA, UPK55L-TRTDKA, UPK56L-CRTLKA, UPK56L-CRTSKA, UPK56L-PSTLKA, UPK56L-PSTSKA, UPK56L-THTDKA, UPK57L-CHTSKA, USK50L-TRTDKA, USK51L-CRTLKA, USK51L-CRTSKA, USK51L-PSTLKA, USK51L-PSTSKA, USK51L-THTDKA, USK52L-CHTSKA, USK55L-TRTDGA, USK55L-TRTDKA, USK56L-CRTLGA, USK56L-CRTLKA, USK56L-CRTSGA, USK56L-CRTSKA, USK56L-PSTLGA, USK56L-PSTLKA, USK56L-PSTSGA, USK56L-PSTSKA, USK56L-THTDGA, USK56L-THTDKA, USK57L-CHTSGA, USK57L-CHTSKA
  • Customer Questions & Expert Answers

    Q:
    Does it fit my car? Posted by ToyotaPartsDeal Specialist
    A:
    You can Select Your Vehicle to check if 13080-31030 fits your vehicle.
    Posted by ToyotaPartsDeal Specialist
    Q:
    How to remove the Timing Chain and Sprocket on V6 engine on 2007 through 2015 Toyota Avalon? Posted by Customer
    A:
    Caution should be exercised during the removal process of the timing system, as any mistakes can lead to severe engine damage. It's advisable not to attempt this procedure without substantial experience in such repairs; consult an expert if uncertain. To initiate the removal, it's recommended to remove the engine/transaxle assembly and the drivebelt, including the drive-belt tensioner and idler pulleys. Set the engine to TDC and remove the crankshaft pulley with care to prevent any damage. Proceed to remove the timing chain cover bolts and the water inlet, along with its O-ring and gasket. Afterward, detach the timing chain cover, ensuring caution in specific removal spots to prevent cover damage. Remove the old crankshaft seal meticulously. Verify the No. 1 piston's position, setting it near TDC on its compression stroke. Ensure alignment of the timing marks on camshaft timing sprockets and the crankshaft sprocket. Following this, manipulate the No. 1 tensioner to lock it and remove it, subsequently removing the chain tensioner slipper. Proceed to remove the idler sprocket shaft and the chain vibration dampers. Take note of the timing marks on each sprocket before removing the No. 1 timing chain and the crankshaft timing chain sprocket. On the right (rear) cylinder head, compress chain tensioner No. 2 and insert a drill bit or punch to lock it. Remove the camshaft timing sprockets and chain assembly, ensuring components are kept separate. Repeat the process for timing chain No. 3 on the left (front) cylinder head. Inspect all timing chain assembly parts for wear or damage, checking the chains for stretch and sprockets for appropriate diameter. Measure idler sprocket oil clearance and evaluate the condition of tensioners and vibration dampers. Ensure correct operation of the chain tensioners. During installation, lock chain tensioner No. 2 with a drill or punch, then proceed to install the tensioners, followed by the timing chains on the camshaft sprockets. Align yellow marking links and timing marks as specified. Install chain guides, the crankshaft timing sprocket, and the idler sprocket collar. Verify alignment of timing marks on camshaft sprockets. Install the No. 1 timing chain, ensuring proper alignment of marks, and lock the No. 1 tensioner with a drill or punch. Remove the drill or punch and confirm tension. Clean surfaces, install a new crankshaft oil seal, O-ring, and apply RTV sealant on the timing chain cover. Slide the cover into place, reinstalling all bolts sequentially and ensuring proper torque. Finally, follow the reverse procedure for the remaining installation steps, refilling fluids, reconnecting the battery, and checking for leaks upon starting the engine.
    Posted by ToyotaPartsDeal Specialist
    Q:
    How to remove and install a Timing belt and Sprocket in 4.7L engine on Toyota Tundra? Posted by Customer
    A:
    In addition to the alignment of the timing belt, the marks in other camshaft sprockets and crankshaft sprockets should be checked after applying the timing belt and before starting the engine, because if the belts are not properly aligned the valves and pistons are likely to be damaged. Start with the removal of the cable from the negative terminal of the battery, then the under-vehicle splash shield and in the last the coolant. Further, do away with the fan shroud and fan assembly, drivebelt, and power steering pump but without severing its hoses accompanied by the alternator and air conditioning compressor but without disconnecting refrigerant lines. Disconnect the throttle body cover solenoid, the drivebelt idler pulley, and if there is any, the hoses from the oil cooler pipe and remove it. Take off the number 3 timing belt covers on the left and the right side, the number 2 timing belt cover, and fan bracket. Remove the drivebelt tensioner and then switch on the engine to bring the number one piston at the top dead center with the correct alignment of the marks on the camshaft and crankshaft sprockets. The crankshaft pulley has to be unbolted with the use of a wrench while locking it to prevent the engine from rotating as well as the number one timing belt cover should also be detached together with the crankshaft sensor timing plate. Take some time to confirm that both the timing marks are at the correct position once you have detached the crankshaft pulley and if you are preserving the belt, you should mark it before you remove it from the sprocket. Remove crankshaft pulley and bolt, turn crankshaft 45-degrees in anticlockwise position, then re-fit the crankshaft pulley and bolt. Take out the timing belt tensioner and you let go of the timing belt between the right side camshaft sprocket and the crankshaft sprocket. Pull out the timing belt from the sprockets, also if required, take off number 1 and number 2 idler pulley. Indeed, it is very important that this crankshaft sprocket be inspected for either wear or signs of damage: if it is found to be damaged or worn out, then the same has to be removed by the use of screwdrivers or a puller. This timing belt is the one that needs to be inspected for whether it is worn, on the other hand the water pump also needs to be checked on whether it is worn as well. Ensure the belt tensioner looks for signs of oil leaks and ensure the pushrod protrusion is adjusted to standard sizes. The overall timing belt area should be cleaned in preparation for the reinstallation of idler pulleys if they were removed during the testing procedure the crankshaft timing sprocket's keyway should also be aligned before the sprocket is installed. The marks on the camshaft sprocket should align with the marks you have set; rotate the crankshaft back to TDC again. Place the timing belt over the sprockets and idler pulleys according to the drawing, turn the timing belt tensioner pushrod and fix it. Rotate the crankshaft slowly two revolutions around clockwise and left anticlockwise and redo the timing marks while no resistance is to be perceived. Place back the crankshaft sensor timing plate, number 1 timing belt cover and gasket, crankshaft pulley and drivebelt tensioner accordingly; Tighten all bolts to the specified torque. Refit the fan bracket, air conditioning compressor, upper timing belt cover and gasket, together with the left and right no. 3 timing belt covers and the remainder in the reverse order. For water and anti-freeze coolant, add more and turn on the cars engine in order to detect any leaks and performance.
    Posted by ToyotaPartsDeal Specialist
    Q:
    Who should attempt this complex procedure for the 2008 Toyota Camry? Posted by Customer
    A:
    This complex procedure should only be attempted by those with extensive knowledge of such repairs or by consulting an expert.
    Posted by ToyotaPartsDeal Specialist
    See expert answers on similar Variable Timing Sprocket
    Q:
    What are the initial steps to begin the timing system removal procedure for the 2007 Toyota Camry? Posted by Customer
    A:
    The initial steps include removing the engine/transaxle assembly, the drivebelt, including the drive-belt tensioner and idler pulleys, and setting the engine to TDC (Top Dead Center).
    Posted by ToyotaPartsDeal Specialist
    See expert answers on similar Variable Timing Sprocket
    Q:
    How do you remove the timing belt tensioner for the 2002 Toyota Avalon? Posted by Customer
    A:
    Rotate the crankshaft pulley counterclockwise 60 degrees BTDC and remove the timing belt tensioner.
    Posted by ToyotaPartsDeal Specialist
    See expert answers on similar Variable Timing Sprocket
    Q:
    What components need to be removed during the procedure for the 2010 Toyota Avalon? Posted by Customer
    A:
    Components such as the crankshaft pulley/vibration damper and timing chain cover need to be removed during the procedure.
    Posted by ToyotaPartsDeal Specialist
    See expert answers on similar Variable Timing Sprocket
    Q:
    What should be verified regarding the piston in the No. 1 cylinder for the 2014 Toyota Highlander? Posted by Customer
    A:
    Verify that the piston in the No. 1 cylinder is near TDC on its compression stroke.
    Posted by ToyotaPartsDeal Specialist
    Q:
    What initial preparations should be made before starting the removal process for the 2006 Toyota Avalon? Posted by Customer
    A:
    Before beginning, make sure you have the necessary special tools and equipment ready. Disconnect the battery's negative terminal and proceed to remove the drive belt, alternator, valve cover, and ABS actuator if applicable.
    Posted by ToyotaPartsDeal Specialist
    See expert answers on similar Variable Timing Sprocket
    Q:
    What should be confirmed for the 2004 Toyota Highlander during installation? Posted by Customer
    A:
    Ensure the TDC marks on the camshaft sprockets are still in alignment.
    Posted by ToyotaPartsDeal Specialist
    See expert answers on similar Variable Timing Sprocket
    Q:
    What components should be removed next for the 2019 Toyota Sequoia? Posted by Customer
    A:
    Remove the power steering pump and alternator.
    Posted by ToyotaPartsDeal Specialist
    Q:
    How should the crankshaft timing sprocket be installed for the 2019 Toyota Sequoia? Posted by Customer
    A:
    Align the keyway with the crankshaft key and install the sprocket with the flange side up.
    Posted by ToyotaPartsDeal Specialist
    Q:
    What should be done with the timing belt guide for the 1998 Toyota Sienna? Posted by Customer
    A:
    Slip the timing belt guide off the crankshaft.
    Posted by ToyotaPartsDeal Specialist
    Q:
    What are the initial steps to begin the removal process for the 2008 Toyota Sequoia? Posted by Customer
    A:
    1. Disconnect the cable from the negative terminal of the battery. 2. Drain the engine oil and coolant. 3. Remove the battery. 4. Remove the engine cover. 5. Remove the air filter housing. 6. Remove the radiator and the cooling fan. 7. Remove the serpentine drive belt. 8. Remove the upper intake manifold. 9. Remove the ignition coils and the valve covers. 10. Remove the Variable Valve Timing (VVT) sensor. 11. Remove the dipstick and dipstick tube. 12. Disconnect the electrical connector from the power steering pressure switch and detach the power steering pump. 13. Remove the alternator. 14. Detach the air conditioning compressor. 15. Unbolt the drive belt tensioner. 16. Remove the idler pulley bolts and the two idler pulleys. 17. Remove the crankshaft pulley. 18. Remove the four bolts from the front of the upper oil pan. 19. Remove the two oil cooler hoses. 20. Disconnect the two radiator hoses from the water inlet. 21. Disconnect all five water bypass hoses. 22. Remove the water inlet and discard the old 0-ring and gasket. 23. Remove the timing chain cover and keep track of the bolt locations. 24. Bring the piston in the No. 1 cylinder to TDC on its compression stroke. 25. Turn the stopper plate on the No. 1 tensioner clockwise and push in the tensioner plunger. 26. Remove the chain tensioner slipper. 27. Unscrew the idler sprocket shaft and remove the idler shaft, sprocket, and collar. 28. Remove the two chain vibration dampers. 29. Remove the No. 1 timing chain. Caution: Do not rotate the crankshaft while the No. 1 timing chain is removed. 30. Remove the crankshaft timing chain sprocket. 31. Compress chain tensioner No. 2 and lock it in the retracted position. 32. Unscrew the two bolts that secure the camshaft timing sprockets to the camshafts and remove them as an assembly. 33. Remove chain tensioner No. 2 and store it with the other components. 34. Repeat the process for the No. 3 timing chain and tensioner.
    Posted by ToyotaPartsDeal Specialist
    See expert answers on similar Variable Timing Sprocket
    Q:
    What should be done after removing the timing chain cover for the 1998 Toyota Sienna? Posted by Customer
    A:
    Carefully pry out the old crankshaft seal with a screwdriver, ensuring not to scratch the seal bore.
    Posted by ToyotaPartsDeal Specialist
    Q:
    What initial steps are needed to access the camshaft sprocket/actuator assembly for the 2008 Toyota Sienna? Posted by Customer
    A:
    Remove the valve cover, timing belt, and intake camshaft, ensuring not to remove the exhaust camshaft or sprocket unless necessary.
    Posted by ToyotaPartsDeal Specialist
    See expert answers on similar Variable Timing Sprocket
    Q:
    What is the procedure for setting the engine to TDC for the 2011 Toyota Tundra? Posted by Customer
    A:
    Set the engine to TDC and remove the crankshaft pulley, ensuring to hold it securely while removing the bolts.
    Posted by ToyotaPartsDeal Specialist
    Q:
    What should I do after completing the installation for the 2010 Toyota Tundra? Posted by Customer
    A:
    54. Remove all old RTV sealant from the gasket mating surfaces. 55. Install a new crankshaft oil seal in the timing chain cover. 56. Install a new O-ring on the left cylinder head. 57. Apply gray RTV sealant on the timing chain cover and indicated locations on the engine. 58. Slide the timing chain cover into place. 59. Install the timing chain cover mounting bolts and nuts, tightening them gradually and evenly. 60. Install and tighten the four oil pan bolts that go into the timing chain cover. 61. The remainder of installation is the reverse of the removal procedure. 62. Refill the engine with oil and coolant. 63. Reconnect the cable to the negative battery terminal. 64. Start the engine and check for leaks.
    Posted by ToyotaPartsDeal Specialist
    If you have any questions about this product, please don't hesitate to ask us. We will be happy to help you!

Genuine Toyota Part 13080-31030, the Right Choice

To ensure reliability, purchase Toyota part # 13080-31030 Gear Assy, Camshaft Timing Exhaust, LH. It is sometimes referred to as Toyota Cam Gear, Toyota Variable Timing Sprocket. For unrivaled quality, OEM parts are the ultimate choice. These parts are manufactured by Toyota's official factory using top-quality materials and undergo strict testing procedures, ensuring outstanding dependability and long-lasting durability. This part fits 2005-2008 Toyota Avalon, 2007-2009 Toyota Camry, 2008-2009 Toyota Highlander, 2006-2009 Toyota Sienna.

ToyotaPartsDeal.com is a leading supplier of genuine Toyota parts and accessories such as Toyota 1308031030 Gear Assy, Camshaft Timing Exhaust, LH. In need of OEM Toyota parts? Look no further than our extensive inventory of genuine Toyota parts, competitively priced to be highly exceptional in the market. They are all manufacturer-warrantied. Add to that, our easy return policy and swift delivery service, and your shopping experience promises to be the great pleasant ever. For detailed Toyota parts information, click here.

Why choose Toyota Parts Deal

  • Dedicated Service

    Your complete satisfaction is our #1 goal

  • Lowest Prices

    Best deals on genuine OE parts from dealerships

  • Fast Delivery

    Orders are processed and delivered promptly