Make sure this part fits

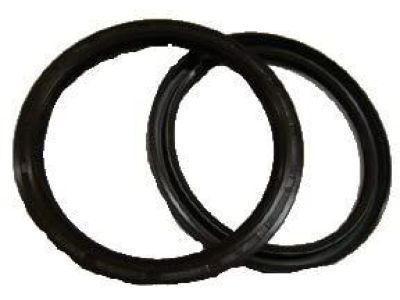
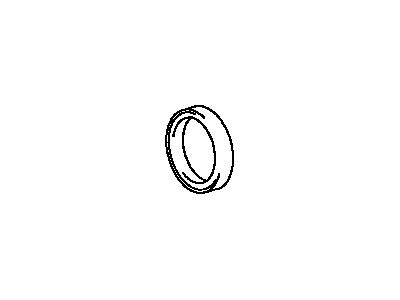
Toyota 90080-31053 Seal, Engine Rear Oil

1998-2016 Toyota 9008031053

Customer Questions & Expert Answers (33)
Toyota 90080-31053 Seal, Engine Rear Oil
  • Part Description
    Seal, Engine Rear Oil
  • Part Name Code
    11381A
  • Position
    Rear
  • Replaced By
    90311-A0027
  • Manufacturer
    Toyota
Make sure this part fits
$43.10 MSRP: $60.25
You Save: $17.15 (29%)
Ships in 1-3 Business Days
1
ADD TO CART
  • Related Parts
  • Product Specifications
  • Vehicle Fitment
  • Customer Questions & Expert Answers
  • Product Specifications

    BrandGenuine Toyota
    Part Name Code11381A
    Manufacturer Part Number90080-31053
    Part DescriptionSeal, Engine Rear Oil
    Item Dimensions4.9 x 4.8 x 0.5 inches
    Item Weight1.00 Pounds
    PositionRear
    ConditionNew
    Fitment TypeDirect Replacement
    ManufacturerToyota
    SKU90080-31053
    WarrantyThis genuine Toyota part is guaranteed by Toyota's factory warranty.
    Shipping & ReturnShipping Policy Return Policy
    Warning: California’s Proposition 65
  • Vehicle Fitment

    Year Make Model Trim & Engine Important vehicle option details
    2006-2016, 1998-2004 Toyota AvalonLimited, XL, XLE Premium, XLE Touring Or Touring, XLS|6 Cyl 3.0L, 6 Cyl 3.5L1MZFE, 2GRFE; 1MZFE; MCX10L-AEPGKA, 2GRFE; GSX30L-AEAGKA, GSX30L-AEANKA, GSX30L-AEAPKA, GSX30L-AETGKA, GSX30L-AETNKA, GSX30L-AETPKA, GSX40L-AETGKA, GSX40L-AETPKA, GSX40L-AETQKA, MCX10L-AEPGKK, MCX10L-AEPNKA, MCX10L-AEPNKK, MCX10L-AESGKA, MCX10L-AESGKK, MCX10L-AESNKA, MCX10L-AESNKK, MCX20L-AEPGKA, MCX20L-AEPGKK, MCX20L-AEPNKA, MCX20L-AEPNKK, MCX20L-AESGKA, MCX20L-AESNKA
    1998-2016 Toyota CamryCE, LE, SE, XLE, XSE|6 Cyl 3.0L, 6 Cyl 3.3L, 6 Cyl 3.5L1MZFE, 2GRFE, 3MZFE; 1MZFE, 2GRFE, 3MZFE; GSV40L-CETGKA, GSV40L-CETNKA, GSV40L-CETSKA, GSV50L-CETGKA, GSV50L-CETSKA, MCV20L-AEPDKK, MCV20L-AEPGKA, MCV20L-AEPGKK, MCV20L-AEPNKA, MCV20L-CEMNKA, MCV20L-CEPDKK, MCV20L-CEPGKA, MCV20L-CEPGKK, MCV20L-CEPNKA, MCV30L-AEAGKA, MCV30L-AEANKA, MCV30L-AEASKA, MCV30L-AEPGKA, MCV30L-AEPNKA, MCV30L-AEPSKA, MCV30L-CEAGKA, MCV30L-CEANKA, MCV30L-CEASKA, MCV30L-CEPGKA, MCV30L-CEPNKA, MCV30L-CEPSKA, MCV31L-AEASKA, MCV31L-CEASKA
    2010-2016, 2002-2007 Toyota HighlanderLimited, Medium, STD, Sport|6 Cyl 3.0L, 6 Cyl 3.3L, 6 Cyl 3.5L1MZFE, 2GRFE, 3MZFE; 1MZFE, 2GRFE; GSU40L-ARAGKA, 3MZFE; MCU20L-BWPNKA, GSU40L-ARAMKA, GSU40L-ARANKA, GSU40L-ARASKA, GSU45L-ARAGKA, GSU45L-ARAMKA, GSU45L-ARANKA, GSU45L-ARASKA, GSU50L-ARTGKA, GSU50L-ARTMKA, GSU50L-ARTNKA, GSU55L-ARTGKA, GSU55L-ARTMKA, GSU55L-ARTNKA, MCU23L-BRANKA, MCU23L-BWANKA, MCU28L-BRANKA, MCU28L-BWANKA, MHU23L-BRXNKA, MHU23L-BWXNKA, MHU28L-BRXNKA, MHU28L-BWXNKA
    2009-2012 Toyota RAV4Limited, Sport, STD|6 Cyl 3.5L2GRFE; 2GRFE; GSA33L-CNAGKA, GSA33L-CNAGKK, GSA33L-CNASKA, GSA33L-CNASKK, GSA33L-CNAXKA, GSA33L-CNAXKK, GSA38L-CNAGKA, GSA38L-CNAGKK, GSA38L-CNASKA, GSA38L-CNASKK, GSA38L-CNAXKA, GSA38L-CNAXKK
    1998-2016 Toyota SiennaCE, LE, SE, STD, XLE|6 Cyl 3.0L, 6 Cyl 3.3L, 6 Cyl 3.5L1MZFE, 2GRFE, 3MZFE; 1MZFE, 2GRFE, 3MZFE; GSL20L-PFADKK, GSL20L-PFAEKA, GSL20L-PFAEKK, GSL20L-PFAQKA, GSL20L-PFAQKK, GSL20L-PRADKK, GSL20L-PRAEKA, GSL20L-PRAEKK, GSL20L-PRAQKA, GSL20L-PRAQKK, GSL23L-SBADKA, GSL23L-SBADKK, GSL25L-PFADKK, GSL25L-PFAEKA, GSL25L-PFAEKK, GSL25L-PFAQKA, GSL25L-PFAQKK, GSL30L-PFTDKA, GSL30L-PFTEKA, GSL30L-PFTQKA, GSL30L-PRTEKA, GSL30L-PRTQKA, GSL30L-PRTSKA, GSL33L-SBTDKA, GSL35L-PFTDKA, GSL35L-PFTEKA, GSL35L-PFTQKA, MCL10L-GFSDKA, MCL10L-GFSDKK, MCL10L-GFSGKA, MCL10L-GFSGKK, MCL10L-PFSDKA, MCL10L-PFSDKK, MCL10L-PFSGKA, MCL10L-PFSGKK, MCL10L-SESDKA, MCL10L-SESDKK, MCL20L-PFADKK, MCL20L-PFAEKA, MCL20L-PFAEKK, MCL20L-PFAQKA, MCL20L-PFAQKK, MCL20L-PRADKK, MCL20L-PRAEKA, MCL20L-PRAEKK, MCL20L-PRAQKA, MCL20L-PRAQKK, MCL23L-SBADKA, MCL23L-SBADKK, MCL25L-PFADKK, MCL25L-PFAEKA, MCL25L-PFAEKK, MCL25L-PFAQKA, MCL25L-PFAQKK
    1999-2008 Toyota SolaraSE, SLE|6 Cyl 3.0L, 6 Cyl 3.3L1MZFE, 3MZFE; 1MZFE, 3MZFE; MCV20L-GCMNKA, MCV20L-GCMNKK, MCV20L-GCPNKA, MCV20L-GCPNKK, MCV20L-GKPNKA, MCV20L-GKPNKK, MCV31L-GCAGKA, MCV31L-GCANKA, MCV31L-GKAGKA, MCV31L-GKANKA
    2009-2016 Toyota VenzaN|6 Cyl 3.5L2GRFE; 2GRFE; GGV10L-AWTGKA, GGV15L-AWTGKA
  • Customer Questions & Expert Answers

    Q:
    I would like to know availability and if it is direct fit replacement Posted by ToyotaPartsDeal Specialist
    A:
    You can Select Your Vehicle to check if 90080-31053 fits your vehicle.
    Posted by ToyotaPartsDeal Specialist
    Q:
    How to replace the rear main oil seal on Four cylinder engine on 2002 through 2006 Toyota Avalon? Posted by Customer
    A:
    Remove the transmission and flywheel. You can carefully pry out the Crankshaft Seal from the engine rear, noting its depth for new seal installation. Also, clean the seal bore thoroughly. Lubricate the new seal's outer diameter and install it over the crankshaft. Use a seal installation tool to press the new seal into place. Reinstall the flywheel and transmission.
    Posted by ToyotaPartsDeal Specialist
    Q:
    What are the steps involved in the installation process for the crankshaft seal on 1997 through 2001 Toyota Avalon? Posted by Customer
    A:
    First of all, mount the crankshaft and main bearing caps, then place the new crankshaft seal in the retainer and bolt it to the block. Also, clean the retainer and then oil the seal's edge before driving it into place. Apply a new gasket with sealant, then gradually tighten the bolts.
    Posted by ToyotaPartsDeal Specialist
    Q:
    How to replace the rear main oil seal on Four cylinder engine on 1997 through 2001 Toyota Avalon? Posted by Customer
    A:
    First of all, remove the transaxle when you are servicing the crankshaft seal. Another method that works involves removing the oil pan and sealing the retainer. Also, get rid of the old gasket material and the old seal. Install the new seal, lubricate the new seal, position a gasket on the engine block, and install the seal. Make sure the retainer bolts are secured and the retainer aligns with the block.
    Posted by ToyotaPartsDeal Specialist
    Q:
    How do you replace the crankshaft and camshaft oil seals in 3.0L and 3.3L V6 engine on Toyota Sienna? Posted by Customer
    A:
    For crankshaft oil seal removal, remove the timing belt and now remove the crankshaft timing belt sprocket. It is also necessary to measure the depth of the seal in the bore and then, carefully remove a part of the seal lip with the razor knife. Effectively remove the existing seal without harming the engine housing bore or the crankshaft, to avoid leakage when using a new seal; and this is best done using a screwdriver or a seal puller. Scrub the bore and lubricate the peripheral surface of the new seal with engine oil or multi-purpose grease and also spread the same grease on to the seal lip. When replacing the seal, use a seal driver or a socket slightly smaller than the seal outside diameter and Hammer the new seal into place to seating, it squarely and to the same depth as previously noted, checking that the spring is still in place. Installation of crankshaft timing sprocket and timing belt- be gentle so as not to damage the crankshaft sensor portion of the sprocket, and check for oil leaks at the front seal by running the engine. For the camshaft oil seals, first, remove the timing belt and the camshaft sprocket(s), next, unfasten the rear timing belt cover. In this case, it is usually outstanding how far the seal is seated in the bore and should be removed with a screw driver carefully while weaving a tape around the tip to prevent scratching the same. Remove the old seal using a seal button scraper or by force and then polish the bore and coat the outer circumference of the new seal with engine oil or multi-purpose grease, for the lip, apply some grease. Bash the new seal into position with the seal driver or socket so that it is in correct alignment and of the same depth as the first one. Replace the rear timing belt cover screw and torque the bolts; also replace the camshaft sprocket(s) and timing belt and start the automobile to test for oil leaks at the camshaft seal area.
    Posted by ToyotaPartsDeal Specialist
    Q:
    What is the first step in the procedure for the 2015 Toyota Camry? Posted by Customer
    A:
    The first step is to remove the engine/transmission assembly from the vehicle.
    Posted by ToyotaPartsDeal Specialist
    See expert answers on similar Crankshaft Seal
    Q:
    What should be done after installing the new seal for the 2009 Toyota Camry? Posted by Customer
    A:
    Install the flywheel or driveplate.
    Posted by ToyotaPartsDeal Specialist
    See expert answers on similar Crankshaft Seal
    Q:
    How do you remove the crankshaft oil seal for the 2000 Toyota Avalon? Posted by Customer
    A:
    Start by removing the timing belt and crankshaft timing belt sprocket. Cut away the seal lip with a razor knife and carefully pry the seal out of the engine using a screwdriver or seal removal tool.
    Posted by ToyotaPartsDeal Specialist
    See expert answers on similar Crankshaft Seal
    Q:
    What is the final step in the installation process for the 2009 Toyota Camry? Posted by Customer
    A:
    The remainder of the installation is the reverse of the removal process.
    Posted by ToyotaPartsDeal Specialist
    See expert answers on similar Crankshaft Seal
    Q:
    What precautions should be taken when using a screwdriver to remove the seal for the 2014 Toyota Camry? Posted by Customer
    A:
    Wrap tape around the tip of the screwdriver to avoid scratching the housing bore or damaging the crankshaft, as this could cause the new seal to leak.
    Posted by ToyotaPartsDeal Specialist
    See expert answers on similar Crankshaft Seal
    Q:
    What is the first step to replace the crankshaft oil seal for the 2003 Toyota Avalon? Posted by Customer
    A:
    The first step is to remove the timing belt and crankshaft timing belt sprocket.
    Posted by ToyotaPartsDeal Specialist
    See expert answers on similar Crankshaft Seal
    Q:
    How can the new seal be driven into place for the 2011 Toyota Avalon? Posted by Customer
    A:
    The new seal can be driven into place using a seal driver or a large socket and a hammer. It is important to ensure that the seal enters the bore squarely and stops when the front face is at the proper depth.
    Posted by ToyotaPartsDeal Specialist
    See expert answers on similar Crankshaft Seal
    Q:
    How should the new seal be installed in the cover for the 2003 Toyota Avalon? Posted by Customer
    A:
    Apply clean engine oil or multi-purpose grease to the outer edge of the new seal, then install it in the cover with the lip (spring side) facing in.
    Posted by ToyotaPartsDeal Specialist
    See expert answers on similar Crankshaft Seal
    Q:
    What should be done after reinstallation to ensure there are no oil leaks for the 2013 Toyota Avalon? Posted by Customer
    A:
    Run the engine and check for oil leaks at the front seal.
    Posted by ToyotaPartsDeal Specialist
    See expert answers on similar Crankshaft Seal
    Q:
    What should be checked after installing the new seal for the 1998 Toyota Avalon? Posted by Customer
    A:
    Ensure the spring of the seal did not pop out of place.
    Posted by ToyotaPartsDeal Specialist
    Q:
    How should the new seal be installed for the 2012 Toyota Avalon? Posted by Customer
    A:
    Lubricate the outside diameter of the seal and install the seal over the end of the crankshaft, making sure the lip of the seal points toward the engine.
    Posted by ToyotaPartsDeal Specialist
    See expert answers on similar Crankshaft Seal
    Q:
    Can the seal be replaced without removing the oil pan or seal retainer for the 2004 Toyota Highlander? Posted by Customer
    A:
    Yes, the seal can be replaced without removing the oil pan or seal retainer.
    Posted by ToyotaPartsDeal Specialist
    Q:
    How do you remove the old seal from the timing chain cover for the 2004 Toyota Highlander? Posted by Customer
    A:
    Carefully pry the seal out of the timing chain cover with a screwdriver or seal removal tool, being careful not to scratch the crankshaft. If using a screwdriver, wrap tape around the tip to avoid scratching the housing bore or damaging the crankshaft, as damage to the crankshaft can lead to leaks with the new seal.
    Posted by ToyotaPartsDeal Specialist
    Q:
    What is the first step in the process for the 2012 Toyota Highlander? Posted by Customer
    A:
    Remove the crankshaft pulley.
    Posted by ToyotaPartsDeal Specialist
    See expert answers on similar Crankshaft Seal
    Q:
    How should the new seal be driven into the container for the 2007 Toyota Avalon? Posted by Customer
    A:
    The new seal should be evenly driven into the container using a wood block or a section of pipe slightly smaller in diameter than the outside diameter of the seal.
    Posted by ToyotaPartsDeal Specialist
    See expert answers on similar Crankshaft Seal
    Q:
    What is the first step in replacing the camshaft oil seals for the 2015 Toyota Highlander? Posted by Customer
    A:
    Remove the timing belt and camshaft sprocket(s).
    Posted by ToyotaPartsDeal Specialist
    Q:
    How do you remove the camshaft oil seals for the 1999 Toyota Solara? Posted by Customer
    A:
    Start by removing the timing belt and camshaft sprocket(s). Remove the bolts and detach the rear timing belt cover.
    Posted by ToyotaPartsDeal Specialist
    See expert answers on similar Crankshaft Seal
    Q:
    What should be done after removing the transaxle for the 2008 Toyota Highlander? Posted by Customer
    A:
    Remove the driveplate.
    Posted by ToyotaPartsDeal Specialist
    Q:
    How should the new seal be positioned onto the crankshaft for the 1999 Toyota Sienna? Posted by Customer
    A:
    Slowly and carefully push the seal onto the crankshaft, working it onto the crankshaft with a smooth object such as the end of an extension as you push the retainer against the block.
    Posted by ToyotaPartsDeal Specialist
    Q:
    What should be done before slipping the seal/retainer over the crankshaft and bolting it to the block for the 2000 Toyota Solara? Posted by Customer
    A:
    The seal lips should be lubricated with clean engine oil or multipurpose grease.
    Posted by ToyotaPartsDeal Specialist
    See expert answers on similar Crankshaft Seal
    Q:
    How should the oil seal be removed from the cover for the 2006 Toyota Solara? Posted by Customer
    A:
    Carefully pry the oil seal out of the cover with a seal puller or a large screwdriver. Be very careful not to distort the cover or scratch the crankshaft! Wrap electrician's tape around the tip of the screwdriver to avoid damage to the crankshaft.
    Posted by ToyotaPartsDeal Specialist
    See expert answers on similar Crankshaft Seal
    Q:
    What are the final steps of the procedure for the 2001 Toyota Solara? Posted by Customer
    A:
    The remaining steps are the reverse of removal.
    Posted by ToyotaPartsDeal Specialist
    See expert answers on similar Crankshaft Seal
    Q:
    How do you install the new seal for the 2009 Toyota Sienna? Posted by Customer
    A:
    Using a seal driver or a socket with an outside diameter slightly smaller than the outside diameter of the seal, carefully drive the new seal into place with a hammer. Ensure that the seal lip is lubricated and that the seal is installed squarely and driven in flush with the surface of the timing chain cover. After installation, check the seal to make sure the spring didn't pop out of place.
    Posted by ToyotaPartsDeal Specialist
    Q:
    How should the new seal be installed for the 2007 Toyota Solara? Posted by Customer
    A:
    It should be installed over the end of the crankshaft, ensuring that the lip of the seal points toward the engine.
    Posted by ToyotaPartsDeal Specialist
    See expert answers on similar Crankshaft Seal
    Q:
    What should be done after installing the new seal for the 2004 Toyota Sienna? Posted by Customer
    A:
    The remainder of the installation is the reverse of removal.
    Posted by ToyotaPartsDeal Specialist
    Q:
    What is the first step in the installation process of the crankshaft for the 2002 Toyota Sienna? Posted by Customer
    A:
    The crankshaft must be installed first, and the main bearing caps or cap assembly should be bolted in place. Then, the new seal should be installed in the retainer, and the retainer should be bolted to the block.
    Posted by ToyotaPartsDeal Specialist
    Q:
    What should you do after removing the camshaft oil seal for the 2004 Toyota Solara? Posted by Customer
    A:
    Clean the bore and coat the outer edge of the new seal with engine oil or multi-purpose grease. Apply grease to the seal lip.
    Posted by ToyotaPartsDeal Specialist
    See expert answers on similar Crankshaft Seal
    Q:
    How should the crankshaft front oil seal be removed from the oil pump housing for the 2000 Toyota Solara? Posted by Customer
    A:
    Carefully pry it out with a screwdriver or seal removal tool.
    Posted by ToyotaPartsDeal Specialist
    See expert answers on similar Crankshaft Seal
    If you have any questions about this product, please don't hesitate to ask us. We will be happy to help you!

Genuine Toyota Part 90080-31053, the Right Choice

To ensure reliability, purchase Toyota part # 90080-31053 Seal, Engine Rear Oil. It is sometimes referred to as Toyota Crankshaft Seal. For unrivaled quality, OEM parts are the ultimate choice. These parts are manufactured by Toyota's official factory using top-quality materials and undergo strict testing procedures, ensuring outstanding dependability and long-lasting durability. This part fits 1998-2016 Toyota Avalon, 1998-2016 Toyota Camry, 2002-2016 Toyota Highlander, 1998-2016 Toyota Sienna.

ToyotaPartsDeal.com is a leading supplier of genuine Toyota parts and accessories such as Toyota 9008031053 Seal, Engine Rear Oil. In need of OEM Toyota parts? Look no further than our extensive inventory of genuine Toyota parts, competitively priced to be highly exceptional in the market. They are all manufacturer-warrantied. Add to that, our easy return policy and swift delivery service, and your shopping experience promises to be the great pleasant ever. For detailed Toyota parts information, click here.

Why choose Toyota Parts Deal

  • Dedicated Service

    Your complete satisfaction is our #1 goal

  • Lowest Prices

    Best deals on genuine OE parts from dealerships

  • Fast Delivery

    Orders are processed and delivered promptly